My Blinkies :)


Creative Fabrica

Creative Teams


Artists & Stores


Feb 4, 2015

Cherry Berry
This tutorial is
written in Corel X5, but any version should work.
This is inspired by
the PTU Kit maker
Gimptastic Scraps
with a matching tube by Freya Langford-Sidebottom
The PTU Kit is called
Cherry Berry Crush

Gimptastic Scraps stores
Can be found Here Gimptastic Scraps
The artwork of Freya
Langford-Sidebottom can be bought
At her Esty store

Here Art of Freya
I am using a FTU Maks
by Zuzzzana
You can find them all
on her blog
Here Zuzzanna's Blog
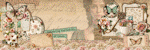
Open 700x700 size tag
Frame2 c/p re-size by
70% rotate 90° to the right hand side of tag, leave in the middle…
Petals c/p pull to
the left hand edge of frame, tube will cover some of this…
Take the colors of
the tube you wish to use, merge them into one layer, then paste as a new layer,
re-size it by 70% pull to the left hand edge of tag…
Leaf1 c/p mirror pull
to the left hand edge of tube, flowers will go over…
Flower2 c/p re-size
by 75% pull to the left hand edge of tube…
Flower4 c/p re-size
by 60% pull to the lower left hand edge of your tag…
Pearls c/p pull down
to the bottom of the pink flower…
Berries c/p re-size
by 80% pull even with the flower copy the re-sized layer mirror it, and paste
just a little below the other set…
Flower1 c/p pull to
the lower right hand edge of your tag…
Bottle c/p pull to
the lower left hand edge of tag…
Berry2 c/p re-size by
55% pull to the right hand side of flower1
Berry1 c/p re-size by
55% pull to the left hand side of flower1
Heart Scatter c/p
re-size by 55% pull to the lower left hand edge of tag…
EnvelopScatter c/p
mirror re-size by 65% pull to the right hand edge of tag…
Label2 c/p pull to
the top of pink flower, on the lower right hand edge of tag…
Go to the bottom
layer of your tag, paste Stamp…
Now go to layer below
this flood fill with paper4 apply the mask from above, merge into one layer,
and add a sharpen more, and this drop shadow
Vertical 5
Horizontal 3
Opacity 100
Blur 5
Color black
Go up to the top most
layer make a new raster so you can put your copyright and credits to kit maker
if they require it and make sure to put your License info on the tag…
©LadyDragus 2015
Tag for kit maker and artist


Subscribe to:
Post Comments
(Atom)
Kit Match For

Stores I Sell At


Forums

Blogs I follow
.gif)


Blog Trains for HODG


0 comments:
Post a Comment
Thank you for reading my tutorials and snagging my snags. I design under House of Dragus Graphics by LadyDragus