My Blinkies :)



Creative Fabrica

Creative Teams







Artists and Store I like


















I am a member of Manipulated by Magik
We have a October fest going on these 2 tags where for different days
The first one comes with word art also


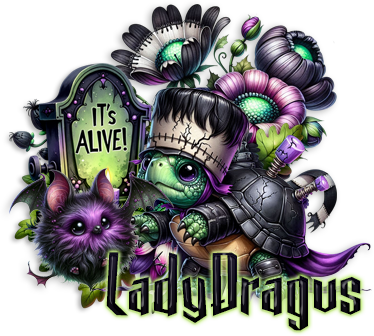
Rocking Dioboli

This tutorial is written in Corel 2023, but any version should work, this is written in hopes you have working knowledge of Paint Shop Pro or other graphics program… this is written by me, never meant to copy or look like your work…

Font Rockybilly (ptu)

This is a 750x750 size tag (you can size down at the end)
Click on top most raster layer of your tag add a new layer, for the copyrights and credit to the kit maker, Do not add template by to your tag, I do not want that done, just put a link on your tutorial. Thank you for reading my tutorial
Thank you
©LadyDragus~26
Tag for kit maker

Nocturne Phantom

This tutorial is written in Corel 2023, but any version should work, this is written in hopes you have working knowledge of Paint Shop Pro or other graphics program… this is written by me, never meant to copy or look like your work…
I am using the PTU artwork
Of Nene Thomas
Called Blue Nocturne

You can find her tube
I am using a FTU kit add-on
By Manipulated by Magic

You can find this free
Here FTU ‘The Phantom Carriage’ Add- On
Open a 600x300
Flood fill bottom layer with paper 3
91 c/p size this down by 35% pull to the far upper left of the tag
Take the tube we are using c/p pull her to the right side of the tag, where her waist is at the bottom of the tag
28 c/p mirror size this down by 61% pull to stand below the moon
25 c/p rotate 90° to the right then size down by 55% pull to stand on the left edge of the tag , them pull a 2nd on make it look like the top leaf is sitting on her shoulder
73 c/p size this down by 33% pull to sit on right of the tombstone and tree
23 c/p size this down by39% pull to stand just in front of the tube by her elbow
21 c/p size this down by 41% pull to stand on the right of the hourglass
19 c/p size this down by 36% pull to the middle of the tag
15 c/p size this down by 31% pull to the right side of the flowers
62 c/p size this down by 31% pull to sit on top of the hour glass
69 c/p size this down by 31% pull to to the very far left edge of the tag
11 c/p size this down by 25% pull it so it sit’s under the blue rose by the tube
96 c/p size this down by 50% pull to the middle of the tag
Add a new layer for your copyrights and credit to the kit maker, add a saying to the tag and you are done…
Thank you for reading this tutorial
©LadyDragus~26


This tutorial is written in Corel 2023, but any version should work, this is written in hopes you have working knowledge of Paint Shop Pro or other graphics program… this is written by me, never meant to copy or look like your work…
I am using a PTU kit

You can find this kit
Here Black No 1 Kit
I am using the PTU artwork
At Digital Art Heaven

Font Fairy Cottage (PU only)
https://www.dafont.com/fairy-cottage.font
Open a 700x700 size tag
Frame 1 c/p size this down by 75%
80 c/p size this down by 65% pull to sit on the top middle of the frame
74 c/p pull this to the far left edge of the frame
35 c/p mirror pull this to the left edge of the frame
7 c/p size this down by 50% pull to the upper top right of the frame
15 c/p size this down by 50% pull to sit on bottom of the tube
17 c/p mirror size this down by 40% pull to the far right edge of the graveyard
56 c/p size this down by 32% pull to sit on right edge of the tubes dress
119 c/p size this down by 32% pull so that the eye is in the middle of the ribbon on the rose and heart
84 c/p size this down by 32% pull to fly on the right edge of the moon
45 c/p size this down by 59% pull to sit in the middle of the skulls on the left edge of the tag
20 c/p size this down by 31% pull to the left edge of the tag just under her hand
53 c/p size this down by 36% pull to hang on the far right edge of the tag
14 c/p size this down by 24% pull to sit on the right of the eyeball ring
111 c/p size this down by 46% pull to sit on the far right, but by the skull and candle
Click on the bottom layer of your tag flood fill with P1 apply the mask from above, then merge this into one group layer…
Click on the top most layer of your tag
Add a new layer for your credits’ and a saying, and you’re done…
©LadyDragus~2026
tags for kit maker artist and DAH


Beach Treasure

This tutorial is written in Corel 2023, but any version should work, this is written in hopes you have working knowledge of Paint Shop Pro or other graphics program… this is written by me, never meant to copy or look like your work…
I am using a PTU kit
By Manipulated By Magick
Called Beach Treasures

You can find this in her store
Here Beach Treasure's
I am using a PTU tube
By Nocturne She sells exclusive at
Digital Art Heave,
Tubes Name is Juice

You can find this tube
Here Nocturne ~ Juice
Scrappy bit of tun
~Sophisticat Simone~ Mask 11
Here Mask's
** this a bulk download and it’s in the top link**
Open up a 715x715 size tag
Frame 6 c/p size this down by 65%
22 c/p pull this to the bottom of your frame
60 c/p size this down by 50% pull to the far right edge of the tag
72 c/p size this down by 40% pull to sit on top of the outer edge of the tag, but on top of the bird
56 c/p size this down by 75% pull to the left edge of the tag
39 c/p size this down by 56% pull to sit in front of the tree
Take the tube we are using c/p size her down by 50% pull to the middle of the sand
99 c/p size this down by 40% pull to sit on the left edge of the tube
20 c/p size this down by 30% pull to sit in front of the bear
83 c/p size this down by 35% pull to sit under the white bird
32 c/p size this down by 35% pull to the right side of the tube in front of the pail
36 c/p down by 35% pull to sit on the right side of the bear
18 c/p size this down by 26% pull to sit in front of the pail
17 c/p size this down by 30% pull to sit by the pearls in the shell
61 c/p size this down by 46% pull to fly above the tree
79 c/p size this down by 22% pull to sit on the pail on the right side
41 c/p size this down by 22% pull to sit by the crab
51 c/p size this down by 22% pull to sit on top of the pail
45 c/p size this down by 22% pull to sit in front of the mels crabs sign
78 c/p size this down by 22% pull to sit on left edge of the tag
76 c/p size this down by 25% pull to sit on right of the turtle
89 c/p size this down by 25% pull to sit on the right edge of sunglasses
Click on bottom layer of your tag Open BT B1 flood fill this layer , merge into on layer then click on the top most layer of your tag , add a saying to the tag and you’re done…
Thank you for reading my tutorial
©LadyDragus~2026
Tags for artist , Kit maker and store


The Phantom

This tutorial is written in Corel 2023, but any version should work, this is written in hopes you have working knowledge of Paint Shop Pro or other graphics program… this is written by me, never meant to copy or look like your work…
I am using a PTU kit
By Manipulated By Magik
Called The Phantom Carriage

You can find this kit
I am using one of the tubes included in the kit
TPCT1
DropShadow for the whole tag DS
Vertical 5
Horizontal 3
Opacity 65
Blur 5
Color black
VivMask 088
Here Viv Mask
Open a 750x750
F6 c/p rotate 90° to the right then size down by 80%
50 c/p pull this to the far right hand edge of the frame
42 c/p pull this to the bottom of the frame
179 c/p size this down by 50% pull to the upper left hand top of the frame
181 c/p pull to cover up the bottom of the moon
32 c/p pull this to the far left edge of the frame
Take the tube we are using c/p size her down by 41% pull to the far left edge of the frame
51 c/p size this down by 55% pull to sit in front of the tube on the left
104 c/p size this down by 65% pull to hang off the top of the cross on the right edge of the tag
139 c/p size this down by 36% pull to sit on right of the graveyard mix on the left side of the tag
30 c/p size this down by 36% pull to sit in front of the empty urn
34 c/p size this down by 36% pull to sit on the left edge of the urn
88 c/p size this down by 50% pull to the upper right top of the frame, then add the DS from above
23 c/p size this down by 26% pull to sit on left edge of the hour glass
90 c/p size this down by 55% pull to stand on the right edge of the hourglass
84 c/p size this down by 55% mirror pull to sit in front of the grim reaper
86 c/p mirror size this down by 31% pull to stand in front of the carriage
194 c/p leave as this falls on the tag
Click on the bottom layer of your tag ope paper 30 resize this down to 715x715 then paste this in the tag, apply the mask from above, merge into one layer
Click on the top most layer of you tag, add a new raster for the copyrights (included in the tube folder) then add a saying to the tag and you're done..
Thank you for reading my tutorial
©LadyDragus
Tags for the artist , mask maker and Kit maker


She also has a huge Add on to this kit
The add is stunning and it's also huge

https://ko-fi.com/s/5ea4f65d6f
Kit Match For


Stores I Sell At


Blog Trains for HODG






Forums

Blogs I follow