My Blinkies :)



Creative Fabrica

Creative Teams





Artists and Store I like


















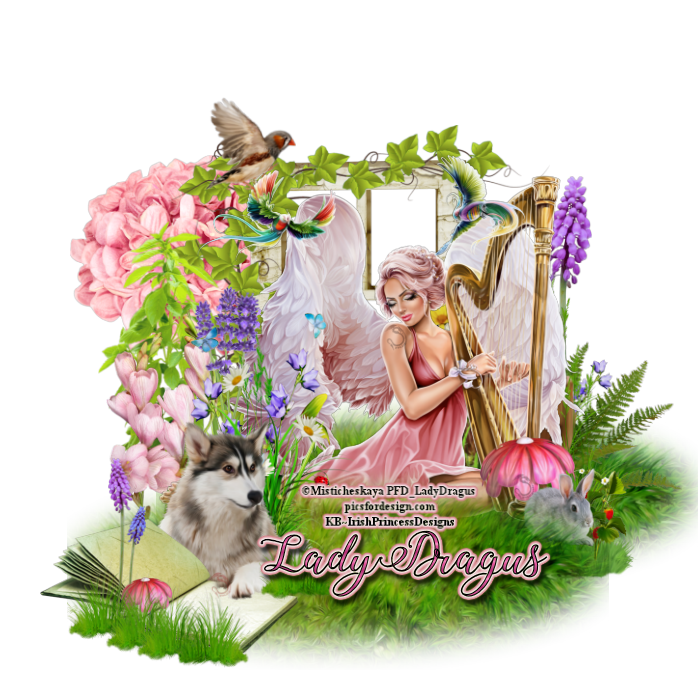
Wild Flowers Walk

This tutorial is written in Corel 2021, but any version should work, this is written in hopes you have working knowledge of Paint Shop Pro or other graphics program… this is written by me, never meant to copy or look like your work…
I am using a PTU kit
By Irish Princess Designs
Called Wildflowers

You can find her kits
&
I am using an exclusive Tube
By Alec Rud

Rachel mask 855
Here Rachel's Blog Spot
Open a 750x750
Frame 8 c/p size this down by 60%
128 c/p rotate 45° to the left, size down by 40% pull behind the frame on the upper left
16 c/p size this down by 33% pull to sit on right of the yellow flowers on left edge of the frame
190 c/p mirror size this down by 22%pull to sit in the limbs on left edge of the tag
65 c/p size this down by 45% pull to the right edge of the frame
102 c/p size this down by 80% pull to the bottom of the frame
66 c/p size this down by 31% pull to the far left edge of the grass
Take the tube we are using c/p size her down by 17% pull to the middle of the grass
69 c/p size this down by 29% pull to the very far right of the tag
53 c/p size this down by 15% pull to sit on right side of the tag
74 c/p size this down by 60% pull to the top of the tag
51 c/p mirror size this down by 15% pull to sit in front of left tire
54 c/p mirror size this down by 6% pull to sit in front of the birdhouse
194 c/p size this down by 15% pull to the middle of the tag
Click on bottom layer of your tag open paper25 size this down to 705 pixels paste as a new layer, then apply mask from above ,merge into one raster layer click on top most layer of your tag
Make a new raster layer for the copyrights and credit to the kit maker, add a saying to the tag and you’re done…
Thank you for reading my tutorial
©LadyDragus~2023




This tutorial is written in Corel 2021, but any version should work, this is written in hopes you have working knowledge of Paint Shop Pro or other graphics program… this is written by me, never meant to copy or look like your work…
I am using a PTU kit
By Wicked Diabla
Called Christmas Cheer

You can find her kits
Here Christmas Cheer Kit
I am using a PTU tube by Alehandra_Vanhek
Called Christmas Presents

This is a exclusive tube, but you can still buy this at a slightly higher price
WSL-108
Here Wee Scots lass
Open a 750x750
24 c/p size this down by 70% pull to the middle of the tag
E26 c/p pull between the snow, size it down by 55% pull so it is behind the workshop
50 c/p size this down by 55% pull to the right side of the workshop, c/p a 2nd one pull to the left of the workshop
83 c/p size him down by 33% pull to the left edge of your tag
Take the colorized tube we are using, and the cat and dog, size them all down by 20% pull to the right edge of the tag
12 c/p size this down by 16% pull to sit in front of Santa
3 c/p size this down by 15% pull to sit in front of the tube
57 c/p size this down by 15% pull to sit on left side of wagon
85 c/p size this down by 15% pull so it is flying by the tree
6 c/p size this down by 15% pull to sit on right of the drum
67 c/p size this down by 11% pull to sit on right of the bear
62 c/p size this down by 11% pull to sit on left edge of the drum
60 c/p size this down by 11% pull to stand in front of the drum
16 c/p size this down by 11% pull to sit in front of wagon
78 c/p size this down by 11% pull to sit in front of truck and other red present
76 c/p size this down by 15% pull to sit by the coffee mug on left side of the drum
74 c/p size this down by 75%, then move one over the right side of the tag and a 2nd copy on the left side of the tag
Click on bottom layer of your tag (this is when I size my tags down)
Flood fill bottom layer with paper6 apply mask from above, merge this into one layer…
Click on top layer of your tag add a new raster layer, for the copyrights and credit to the kit maker, make sure you have a valid License to use this person’s artwork…
Add a saying to the tag and you’re done…
Thank you for reading my tutorial
©LadyDragus~2022
Tag for kit maker

Darkness Comes
Show off tags


This tutorial is written in Corel 2021, but any
version should work, this is written in hopes you have working knowledge of Paint Shop Pro or other
graphics program… this is written by me, never meant to copy or look like your
work…
I am using a PTU kit
By Savage Dezines
Called

You can find her kits
Here Savage Dezines
By Misticheskaya
Here PFD~Misticheskaya
Open a 750x750 size tag (size down at the end)
Frame 3 c/p size this down by 65%
E60 c/p size this down by 41%
E87 c/p size this down by 60% pull to the upper left
edge of frame, take a 2nd copy c/p mirror pull to the end of the 1st
one
Add this drop shadow
Vertical 5
Horizontal 3
Opacity 75
Blur 7
Color black
E95 c/p rotate 90° to the right pull to flow over the
vines
E12 c/p size the branch down by 45 pull to the bottom
edge of your frame
E62 c/p size this down by 74% rotate 45° to the right
pull to sit on the right edge of the frame, add the drop shadow from above
E56 c/p size the books down by 65% pull to the middle
of the frame
E3 c/p size this flower down by 25% pull to sit in
front of the book that is leaning on the others
E71 c/p size this silver rose down by 30%, then pull
to sit on right of the white flower
E52 c/p pull this to the far left edge of your frame
Take the tube we are using , and what ever color you
choose to work with I’m using the grey layer, and her black teddy bear with
pink wings paste her size her down by 26% pull to the right edge of the frame
E44 c/p size this down by 40% pull to sit in front of
her knee
E58 c/p size this skull down by 40% pull to the left
edge of the other skull
E99 c/p size the cake down by 50% pull to sit in front
of her knees on the tag
E55 c/p size this down by 45% pull to the left side of
the skulls
E43 c/p size the white rose down by 25% pull to the
left edge of the candle
E53 c/p size this rose down by 30% pull to lay in
front of skulls
E54 c/p size this rose down by 30% pull to sit on
right of pink rose in front of the cake
Click on bottom layer of your tag flood fill with
paper 13 using your magic wand tool crop off any of the paper that is outside
of the frame, the only part should be behind the frame, add the drop shadow
from above to the frame
Click on layer behind the paper
E94 c/p flip vertical, mirror pull this to the upper
right so it looks like the moon is behind the paper, add the drop shadow from
above
Click on top most layer of your tag add a new raster
for the copyright and credit to the kit maker, add a saying to the tag and
you’re done.. .
Thank you for reading my tutorial
©LadyDragus ~ September 2021

Millie's Magic Show off and Snags


Here Yuedes Kreationz Profile


Tag for Zindy

Blood Moon

This tutorial is written in Corel X5, but any version
should work, this is written in hopes you have
working knowledge of Paint Shop Pro or other graphics program… this is
written by me, never meant to copy or look like your work…
I am using a PTU kit
By Designz By Shelly

She sells in many store
You can find them
Here Digi Style Designs
Mystical Scraps Store
Pics For Design
I am using a PTU Exclusive
Tube by Alehandra_Vanhek
You can find his normal tubes
Here Alehandra_Vanhek PFD
I am using a FTU mask
By Vix 2012-4
You can find them all
Here Vix PSP
Open a 725x725
Gate c/p size down by 50%
Tree1 c/p size down by 65% pull to the right edge of
your tag
Grass covering 2 c/p size down by 61% pull to bottom
of the gate
Crow3 c/p size down by 48% pull to the bottom left of
your gate
Tree4 c/p size it down by 80% pull to cover up the
tree crow3 is sitting on
Tomb stone1 c/p size down by 45% pull to sit on left
edge of tree
Take the parts of the tube you wish to have with the
girl, paste them and size it all down by 27% pull to the middle of tag
Click on bottom layer of your tag
Tree3 c/p then pull it to the left edge of your tag
Candle Stick 2 c/p size it down by 25% pull to sit on
left side of tombstone
Candle c/p pull to sit on the right of candle stick2
size it down by 25%
Book 2 c/p size down by 40% pull to sit in front of wolf
Potion 2 c/p size down by 25% pull between book and
candles
Goblet c/p size it down by 19% pull to sit on right of
bottle
Coffin c/p size it down by 25% pull to sit on right of
book
Potion bottle3 c/p size it down by 25%, pull to sit at
bottom of coffin
Potion jar c/p size it down by 16% pull to sit in
front of book
Feather pen c/p size it down by 16% pull to lay on the
potion
Click on bottom raster layer of your tag, flood fill
with paper24 apply mask from above, then merge into one group layer size it down
by 90%
Click on top most layer of your tag,
Fog c/p pull so it covers up most of the tag
Add a new raster layer for your credits and copyright
information, please have a valid license to use this tube.
Add a saying to the tag and it’s done…
©LadyDragus~ October 2020
Tag for kit maker and mask maker




Kit Match For


Stores I Sell At


Forums

Blogs I follow

.gif)


















Blog Trains for HODG



