My Blinkies :)

tk-Lady-Dragus-Blinkie2 2yua6c9-zpse3dc4e4b SD-Lady-Dragus-Art-vi-zps3b1bdf76

Creative Fabrica

2a

Artists & Stores

DAHBlinkie Mistichakya tinyturtle bellablinki tooshtoosh-vi kJx6Gd6 US5svJk 2v2a-LUr-TWx-EGj7i Hania

Blogs I follow

tk-MonsterQueen 2v2a-LUr-TWx-EGj7i ohRZaai syl tk-BHD-blinkie MizT BeckySE

Search This Blog

Showing posts with label RR_mask. Show all posts
Aug 14, 2020

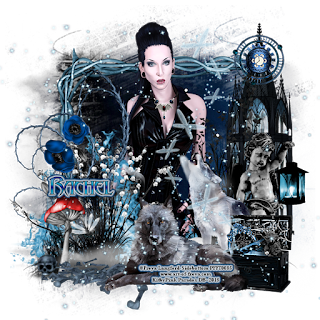
 Till We Meet Again 


This tutorial is written in Corel X5, but any version should work, this is written in hopes you have  working knowledge of Paint Shop Pro or other graphics program… this is written by me, never meant to copy or look like your work…


I am using a wicked kit

By Wicked Diabla

Called; Until we meet again


You can buy this kit

From her store

Here  Wicked Diabla Store


I am using the PTU artwork of

Rebecca Sinz Called Dark Passion


You can find all of her tubes Rebecca Sinz


I am using a FTU mask by

These are bulk on the right side of this blog

Rachels Desigsn (Old blog) Set1_3
Here Rachel Designs (Old blog)

 Her new blog Rachel Designs 

Open a 725x725 tag

E41 c/p size it down by 65%

E70 c/p size it down by 75% pull to the upper portion of the frame

E13 c/p size it down by 30% pull to the far left of your tag

Take your tube c/p size it down by 75% pull to the middle of your frame

E38 c/p size it down by 30% pull to the far right of your tag

E36 c/p size it down by 50% pull to the far left of your tag

E39 c/p size the skull down by 30%

E35 c/p size the candle down by 30% pull to the left of skull

E4 c/p size down by 21% pull to the left of the dragon

E8 c/p size it down by 30% pull to the far left edge of the tag

E67 c/p mirror, then size it down by 30% pull to the right edge of your tag

E56 c/p size it down by 20% pull to sit on left side of vase

 E7 c/p rotate 45° to the right then size it down by 20% pul to sit on right of candle

E29 c/p size it down by 22% pull to sit on the left side of the skull

E6 c/p rotate 45° to the left size the black flower down by 15% pull to sit on bottom of goblet

Click on the bottom layer of your tag flood fill with paper 5 apply mask from above

Click on top most layer of your tag add a new raster layer for your credits to artist and kit maker, make sure you have a valid license to user her artwork…


Thank you for reading my tutorial

Thank you Izzy for the use of your kit


©LadyDragus~ 2020

Sep 18, 2015
Steam Mystique

This tutorial is written in Corel X5, but any version should work.
It is written in hope’s you have a working knowledge of Paint Shop Pro, or other graphics program.
It is taking out of my own mind and thought’s never meant to copy or looks like others.

I am using a PTU Kit by
Pink Paradox Productions
Called
Steam Mystique


Carrie sells at only one store

I am using a Exclusive Tube
By Misticheskaya
She sells at Pics For Design
(when working with a tag with many layers merge the colors you wish, and make a close up and a smaller version of the tube)
We will be using the close up of the full size tube for this tutorial

I am using a FTU mask by 
Rachels Designs

Open a 700x700 size tag, you can re-size later
129 c/p re-size by 55% pull to the upper left hand edge of frame…
Frame 17 c/p re-sized by 55%
Take the close up paste it re-size it by 60% pull to the bottom edge of your tag…
137 c/p re-size by 25% pull to the far right hand edge of the tag…
139 c/p re-size by 25% pull to the left hand edge of tube, add a sharpen more to the element…
155 c/p re-size by 40% pull to the bottom edge of the tag…
75 c/p re-size by 35% pull to the lower right hand edge of rose…
55 c/p rotate 90° to the right re-size by 30% pull to the far right of glob…
43 c/p re-size by 50% pull to the right hand edge of books…
35 c/p re-size by 35% pull to the middle of the rose…
56 c/p re-size by 30% pull to the bottom right side of tag…
44 c/p re-size by 35% pull to the right of books…
30 c/p re-size by 15% pull to the middle bottom of books…
50 c/p rotate 45° to the right pull to the far left hand edge of the tag, add a sharpen more to the element …
60 c/p mirror re-size by 25% pull to the far left hand edge of your tag…
49 c/p re-size by 30% pull to the far left hand edge of your tag…
57 c/p re-size by 20% pull to the left hand side of goblet…
66 c/p mirror re-size by 20% pull to the right hand side of compass…
39 c/p re-size by 25% pull to the middle of your tag…
41 c/p re-size by 20% pull to the right hand edge of your tag…
37 c/p re-size by 25% pull to the far left hand edge of your tag…
18 c/p mirror re-size by 25% pull to the upper right hand edge of your tag…
183 c/p re-size by 70% paste that 2 more time on the left hand edge of tag, and right…
Go to the bottom of your tag flood fill that layer with paper 11 apply mask from above merge into one layer up-size by 105% add a drop shadow of your choice, add a new layer and flood fill with paper42 apply same mask, then rotate 45° to the right add same drop shadow…


Tags for mask maker

Jun 20, 2015
Beautiful Moment in Time


This tutorial is written in Corel X5, but any version should work, it’s written in hopes you have a working knowledge of Paint Shop Pro or other graphics program…
It is written from my own mind and thought’s, never meant to look like others.

I am using a PTU Kit by
Pink Paradox Productions
Called Beautiful Moments


Carrie sells all of her kits in her own store

I am using a PTU Tube by
SoulDesigner
You can get this tube and many others
When working with a big tube with many layers merge what colors you want to work with. I also make a full size tag only 600 pixels in height and then make a close up of the full size tag, you will want to re-size this if you use it…

The font I’m using is Formal Script
You can find this on many FTU font download sites.

I am using a FTU mask by Rachel Designs

Open a 700x700 size tag

Frame 4 c/p re-size by 55% leave in the middle of your tag…
I took my close up pasted and re-size it by 40%...
135 c/p rotate 90° to the left re-size by 40% pull to the far left, then copy mirror pull to the far right, merge them into one layer…
80 c/p re-size by 21% pull to the left hand edge of your tag…
130 c/p re-size by 45% pull to the left hand edge of the stump…
84 c/p re-size by 20% pull to the bottom left hand edge of your tag…
86 c/p re-size by 30% pull in front of birdbath…
21 c/p mirror re-size by 20% pull to the left hand edge of wagon rotate 15° to the left…
96 c/p re-size by 25% pull so it rings around the umbrealla…
125 c/p mirror re-size by 45% pull to the far right hand edge of your tag…
129 c/p re-size by 35% pull to the lower right hand edge of your tag…
75 c/p re-size by 30% pull to the far right hand edge of your tag…
6 c/p mirror re-size by 25% pull him to make it look like it’s laying on top of the trunk…
36 c/p re-size by 25% pull to the far right hand edge of trunk…
110 c/p re-size by 25 rotate 90° to the left pull it to the left hand edge of trunk…
100 c/p re-size by 25% pull to the left hand edge of your tag, add a sharpen to the element…
117 c/p re-size by 25% pull to the right of rose…
11 c/p re-size by 25% pull to the left hand edge of rose…
116 c/p rotate 45° to the left pull to cover the rocks on the right hand edge of umbrella…
8 c/p re-size by 20% pull to make the bird sit on top of the pink flower…
Flood fill your bottom layer with paper 22 merge into one layer add a sharpen more, then add a drop shadow to make it stand up better..
Go to the top most layer of your tag
Add a new raster layer for credit’s and what ever saying you wish to use..


©LadyDragus~2015

Tags for mask maker and artist


Jun 15, 2015
Queen of the Night

Written By LadyDragus for
Gimptastic Scraps Creative Team
This tutorial is written in Corel X5, but any version should work, I’m writing this from my own thoughts and mind, never meant to look like others.
This is written in hopes you have a working knowledge of Paint Shop Pro X5 or any version of a graphics program….

I am using a PTU kit
By Gimptastic Scraps
Called Queen of the Night
You can only find the kit
You can get this kit and the matching tube 

I am also using the matching tube that match’s the kit
By Eos Spark
This tube can only be bought at
The PSP Project

I am using a FTU Mask by
Rocked By Rachel (Maskset11-4)
You can find all of her goodies on her blog
Here  rockedbyrachel.wordpress.com

 I am using the font Agincourt Plain
You can find this at any FTU Font site

Open a 650x650 size tag, you can re-size if you want…

Frame 5 c/p leave as it falls on tag, add this drop shadow
Vertical 5
Horizontal 3
Opacity 100
Blur 5
Color black
Take your tube clean off anything under the feathers so she looks like she is standing inside of the frame…
Cage c/p re-size by 80% pull to the right hand edge of the frame so it looks to be hanging on it…
Bow c/p re-size by 50% pull to the top of chain…
Branch c/p pull to the left hand edge of your tag…
Flower2 c/p pull to cover the bottom edge of the tube…
Crow c/p re-size by 75% pull to the lower right hand edge of flower2…
Books c/p re-size by 65% pull to the left hand edge of tag…
Pot c/p re-size by 30% add a sharpen more then pull to the left hand edge of books…
Vase c/p re-size by 60% pull to the right hand edge of books…
Gem Flower c/p pull to lower left edge of tag, add a sharpen more to the element…
Deco 1 c/p re-size by 75% pull to the left hand edge of skull/crow…

BlackRose c/p re-size by 60% pull to the middle bottom of your tag…


©LadyDragus~2015 Tutorial 
Tags for Kit maker and mask maker and artist


Jun 3, 2015

Beach Babe
This tutorial is written in Corel X5, but any version should work. It’s written in hopes you have a working knowledge of Paint Shop Pro.
It is written out of my own mind and thought’s not meant to look like others.


I am using a PTU Kit
By
Pink Paradox Productions

You can get all of Carries kit's


I am using a PTU tube by
Disco Science this is an exclusive tube, you either have to be a member to get this or have put in if it was a pre-paid.
Titled Elodi
You can find out more about this tube any many more
With a tube that has multiple layers, make sure you can colorize them to fit your kit, and then merge them into one layer,  I always make a full size one, and then re-size one down to 600pixed high, and a close up of the tube, it depends on how tall she is if I do this..

I am using a FTU mask by
Rocked By Rachel Maskset47_4
You can find all of her freebies on her blog
I am using the font Jungle Leaves you can find this on any FTU font site

Open a 700x700 size tag
Frame 17 c/p re-size by 55% leave in the middle of your tag
Add this drop shadow (this will be the default drop shadow)
Vertical 5
Horizontal -5
Opacity 50
Blur 5
Color black
149 c/p re-size by 45% pull to the far left hand edge of your tag…
116 c/p re-size by 40% pull to the upper left hand edge of your tag…
13 c/p re-size by 30% add a sharpen more to the element pull to the upper left hand side of your tag
71 c/p re-size by 25% pull up to the top left of the light’s to cover up the line above the frame; it will also cover up the hook of the frog charm…
Paste the close up of the tube, I made mine to just below her elbows and re-sized it by 55% pulling it to just a little to the right hand edge of the frame…
8 c/p re-size by 45% pull to the left hand edge of your tag…
147 c/p mirror re-size by 45% pull to the right hand edge of your tube…
118 c/p re-size by 75% pull to cover the bottom edge of your tube…
150 c/p re-size by 35% pull to the left hand edge of your tag…
65 c/p re-size by 25% pull to the bottom edge of tree…
152 c/p re-size by 30% pull to the lower left hand edge of the water…
63 c/p re-size by 45% pull to the lower right hand edge of your tag…
32 c/p re-size by 35% pull to the far right hand edge of your tag…
68 c/p re-size by 50% pull so it’s even with the right hand edge of the glass…
27 c/p re-size by 15% pull to the left hand side of glass…
158 c/p re-size by 25% pull to the left hand side of the other beach sign, add the default drop shadow for this tutorial…
131 c/p re-size by 25% pull to the bottom edge of Beach word art…
74 c/p re-size by 25% pull to the right hand edge of flower…
144 c/p rotate 45° to the left re-size by 25% pull to the lower left hand edge of your tag…
178 c/p re-size by 55% pull down to the bottom edge of tag, copy re-sized version and pull that one to the upper left hand edge of tag…
Go to bottom layer of your tag and flood fill with paper 30 apply mask from above or one of your choice…

Go to the top most layer and add a new raster layer add your copyright, and give credit for the kit maker since she requires this and make sure you have a LIC to use the tube…

Tag for Mask maker Rachel


May 17, 2015

Mermaid Princess

This tutorial is written in Corel X 5, but any version should work, it’s written in hopes you have a working knowledge of Paint Shop Pro… This is never meant to look like others work. Any resemblance to others is purely coincidental, and unintentional…

I am using the a PTU Kit
By Pink Paradox Productions
Titled
Mermaid Princess

Carrie sells all of her kits in her own store

I am using the PTU artwork
Of
KiwieFire Storm
You can get all of his artwork

 Font of Choice I’m using
Gilder Girls

I am using a FTU Mask by
Rocked By Rachel MaskSet35_1
You can find all of her goodies on her blog

You will want a tube that either has a close up, or you can make one and a full size also.

Open a 700x700 you can re-size later…
Frame 1c/p re-size by 55% leave in the middle of your frame.
Take the close up and paste behind the frame, pulling just her face showing through the frame, clean off any extra showing behind the frame…
87 c/p re-size by 70% pull to the bottom edge of your frame…
91 c/p re-size by 65% pull to the bottom edge of your tag…
122 c/p re-size by 50% pull to the left hand edge of your frame…
126 c/p re-size by 40% pull just in front of the grass…
114 c/p re-size by 50% pull to the lower left hand edge of your tag…
113 c/p re-size by 35% pull to the bottom of plant…
84 c/p re-size by 30% pull to the lower right hand edge of your tag…
31 c/p re-size by 25% pull to sit on top of the flowers on the left hand edge of your tag…
61 c/p re-size by 25% pull to the middle bottom of your tag…
51 c/p mirror re-size by 25% pull to the right hand edge of your tag…
108 c/p re-size by 25% pull to the bottom left hand edge of your tag…
4 c/p mirror rotate 90° to the right re-size by 45% pull to the very top edge of your frame, on the right hand side…
110 c/p re-size by 25% pull to the right of the shells…
Go to your bottom layer of you tag flood fill with paper 18 apply mask from above, and add a sharpen more to the merged layer, and this drop shadow
Vertical 5
Horizontal 3
Opacity 75
Blur 5
Color black

Go back up to top most layer, add a new raster layer for you copyright’s and credit to kit maker and artist.. Make sure  you have a License to use his artwork as it is copyright protected…

Thank you

©LadyDragus~2015

Tags for artist  and mask maker


May 11, 2015


Eternal Life

This tutorial is written in Corel X5, but any version should work, this is written in hopes you have a working knowledge of Paint Shop Pro…
It’s written out of my own mind, and thought’s never meant to look like others.

I am using a PTU Kit
By Pink Paradox Productions
Eternal Yearning

She sells all of her kits in her store

I am using a PTU Tube

By Freya Langford-Sidebottom
She sells all of her new tubes
Here in her store Art of Freya PSP Tubes

I am using a FTU Mask by
Rocked by Rachel (maskset13_1)

Open a 700x700 size tag, you can re-size it later

Frame14 c/p re-size by 50% leave in the middle of your tag…
84 c/p re-size by 55% pull to the far right hand side of your frame…
17 c/p re-size by 35% pull to the right of building…
62 c/p re-size by 15% pull to the top of E84, add a sharpen more to the element…
Take the tube, with out the Autopsy Scarring, paste and re-size it by 75% pull to the bottom of the frame, some will overlap…
146 c/p re-size by 60% pull to the far left hand edge of tag…
197 c/p re-size by 45% pull to the far left hand edge of your tag…
177 c/p re-size by 45% pull to the left hand edge of your tag…
65 c/p re-size by 10% pull to her neck to make it look like’s it’s a necklace, then add a sharpen to the element…
170 c/p re-size by 40% pull to the left hand edge of tag…
139 c/p re-size by 60% pull to the bottom edge of frame, clean off any part of her legs showing underneath this element…
195 c/p re-size by 25% pull to the left hand edge of the dragonfly of E139…
5 c/p re-size by 35% pull to the far right hand edge of your tag…
16 c/p re-size by 45% pull to the bottom of the wolf’s foot…
22 c/p mirror re-size by 55% pull to the left hand edge of your tag…
67 c/p mirror re-size by 20% pull to cover up the wolf, on the bottom of his legs add a sharpen more to the element…
135 c/p re-size by 60% pull to the right hand side of your tag, over her right shoulder of the tag…
4 c/p re-size by 40% pull to the left hand edge of trunk..
215 c/p re-size by 55% copy and paste a few times, all on the same layer, to cover the tag…

Go to the very bottom of your tag, flood fill with paper65 apply mask from above, or one of your choice, merge into one layer, and up-size by 105%

Tags for Artist and mask maker


May 8, 2015

Gypsy Sunset


This tutorial is written in Corel X5, but any version should work, it’s written in hopes you have a working knowledge of Paint Shop Pro…
It is written out of my own mind and thoughts, never meant to look like others.

I am using a PTU kit by
Pink Paradox Productions
Gypsy Sunset


You can find all her kits in her own store

I am using a PTU tube by
Alex Prihodko,
You need to have either bought a Exclusive members for a month, or been gifted the tube when it was being made.
You can find out more about how to get the tube

I am using a FTU Mask by
Rocked By Rachel Set43Mask3
You can find all of her goodies on her blog

I am using the font “Old Script” you should be able to get this at any FTU site

Open a 700x700 size tag you can re-size later
When working with a tube that has multiple layers merge the layers and colors you want into one tube, I will also make myself a close up since I use those a lot, I also make a full size version of the tube with the height around 600pixels, you may have to re-size this to fit the tag…

Frame13 c/p re-size by 55% leave in the middle of your tag…
I am using the close up I made, just below her chest, and I re-size it by 60% cleaned off any that covered the bottom of the frame…
149 c/p rotate 45% to the left re-size by 70% pull to cover up the right hand edge of the tag…
139 c/p re-size by 55% pull to the lower right hand edge of tag…
129 c/p flip vertical re-size by 55% pull to cover edge of your tube…
131 c/p mirror re-size by 35% pull to the lower right hand edge of your tag, add a sharpen more to the element…
128 c/p rotate 90° to the left re-size by 45% pull to the bottom of the leaf, add a sharpen more to the element…
29 c/p re-size by 45% pull to the left hand edge of your tag…
11 c/p re-size by 55% pull to the lower right hand edge of the tag…
21 c/p re-size by 25% pull to the left hand edge of your tag…
120 c/p re-size by 25% pull to the left of green jar, then add a sharpen more to the element…
22 c/p re-size by 35% pull to the right hand edge of green jar…
45 c/p re-size by 35% pull to the left hand edge of the tag, over E29…
40 c/p re-size by 20% pull to the bottom of E45…
66 c/p re-size by 15% pull in front of the flower…
151 c/p rotate 90° to the left re-size by 65% pull to the bottom of your tag, then copy, ad paste over the middle of your tag, merge the sparkles into one layer…
Merge what layers you wish to merge so it takes up less room.
Go to the very bottom of your tag, and flood fill with paper 29 apply mask from above, merge into on group layer, up-size by 105% add a sharpen more to the layer, and add this drop shadow
Vertical 5
Horizontal 3
Opacity 50
Blur 5
Color Black

Go back to the top most layer of your tag, give credit for the tube and the kit since it is required, add what ever word you want to use, and your done…


©LadyDragus~2015

Tag for mask maker the kit makers will be on her blog

Apr 25, 2015


This tutorial is written in Corel X5, but any version should work.
It is written in hopes you have a working knowledge of Paint Shop Pro…
It is written out of my own thoughts and mind, not meant to look like others.

I am using a PTU kit by
Pink Paradox Productions
Called  Hidden Forest


Carrie sells at her own store

I am using the PTU artwork of
Elias Chatzoudis
I got this when he was with PTE, but you can get all
Of his tubes

I am using a FTU Mask
By Rocked By Rachel (maskSet48_Mask3)

Open a 700x700 size tag you can re-size it for later…

Frame 6 c/p rotate 90° to the left re-size by 50%...
74 c/p re-size by 50% pull to the far left hand edge of tag, then add a sharpen more to the element…
123 c/p re-size by 50% pull to the far right bottom of your frame, c/p re-sized version and mirror pull it to the bottom left hand edge of your frame, merge them into one layer…
52 c/p re-size by 45% pull to the lower left hand side c/p re-sized version and paste it on the right hand side also, mirror the element…
Take the full size version of you tube and paste, re-size if you want her smaller…
92 c/p mirror re-size by 40% pull to the lower right hand edge of your tag…
143 c/ re-size by 15% pull to make it look like she is laying on one of the flowers leaves…
124 c/p re-size by 35% pull to the lower right hand edge of your tag, c/p mirror and pull to the bottom left hand edge; this will cover up some of the rocks…
63 crop off the right hand edge of the gate, c/p re-size by 60% pull to the far right hand edge it will cover the grass, but look like its part of it…
5 c/p mirror re-size by 20% pull him to sit on top of the gate…
86 c/p re-size by 20% pull to the left hand edge of the gate…
99 c/p re-size by 40% pull to the lower left hand edge of your tag…
72 c/p re-size by 30% pull to the far left hand edge of your tag….
76 c/p re-size by 35% pull to the middle of the house, add a sharpen more to the element…
85 c/p re-size by 25% pull to the left hand edge of your tag, then add  sharpen to the element…
96 c/p re-size by 30% pull to the left hand edge of bush…
18 c/p re-size by 40% pull to the lower right hand edge of your tag…
102 c/p re-size by 66% pull to the very bottom of the grass, the point…
20 c/p rotate 15° to the right and re-size by 20% pull to top left hand edge of your tag…
147 c/p re-size by 70% pull so it looks’s like it covers the whole tag….
Go to the very bottom layer behind the frame flood fill with paper11 apply mask from above or one of your choice, merge into one layer, up-size by 105% add a drop shadow of your choice…

Now go to the upper most layer add a new raster and add your copyright and credit for the kit maker since she requires it…
Thank you for reading/doing my tutorials


©LadyDragus

Tag for mask maker

Apr 23, 2015

Prima Donna  Fairy

This tutorial is written in Corel X5, but any version should work, it is written in hopes you have a working knowledge of Paint Shop Pro or other graphics program.
This is written out of my own, thoughts and mind, never meant to copy or look like others.

I am using a PTU kit by
Scottish Butterfly
Fairy Fantasy

I got this kit as part of the Kandii Popz Dezignz Store CT
You can find her kits and many others

I am using an Exclusive Tube
From an artist at
Pics For Design
I love to work with tubes from this store, you have so many layers and things to play with. I colorized some to match the blue and green in the kit. You can do that also. Since this is a full size tube you’ll want to make a version with the height 550pixels high.. and a close up of your choosing on the tube…
Font I’m using is Blood Shade
EyeCandy 4000 Gradient Glow
 I am using a FTU Mask by
Rocked By Rachel (Maskset_10-3_

Open a 675x675 size tag

Frame 1 c/p re-size by 60% leave in the middle of your tag…
Take the close up of your tube paste and re-size as you need to, I did mine by 45% pulled to the middle of the frame…
Grass c/p pull it to the lower right hand of tag…
Babysbreath  c/p pull in front of the grass add a sharpen more to the element…
Leaves c/p re-size by 80% pull to the bottom right side of frame…
Humming Bird c/p mirror re-size by 75% rotate 15° to the left and pull it to the bottom left hand edge of tube…
Flower bunch c/p re-size by 50% pull to the middle right of the humming bird…
Flower2 c/p re-size by 50% pull to the lower right hand bottom of your tag…
Mushroom2 c/p re-size by 50% pull to the left hand edge of flower2…
Butterfly 2 c/p re-size by 30% rotate 45° to the right and add this drop shadow
Vertical 5
Horizontal 3
Opacity 100
Blur 5
Color black
Pull this to the middle of her arm…
Butterfly1 c/p re-size by 30% pull to the mushroom, add the same drop shadow from above…
Sparkles 2 c/p re-size by 80% pull to the lower right hand edge of your tag…
Click on the very bottom layer and flood fill with paepr12 apply the mask listed above, merge into one group add a sharpen more along with the drop shadow from above…
Take the re-sized version of Sparkels two put it behind the mask layer and paste it a few times to cover the whole background of your tag…

Go back to the top most layer and make a new raster to add your credit for the tube and kit, Make sure you have a lic# to use the tube…

Tag for kit maker and mask maker


Apr 10, 2015

Private Paradise

This tutorial is written in Corel X5, but any version should work.
It is written out of my own thought’s and mind, never meant to look like others.


I am using a PTU kit
By Pink Paradox Productions

She sells all of her kits in her own store

I am using a tube match by
Verymany
This tube can be bought at her store

I am using a FTU Template by
Becky P
You can find all of her goodies on her blog
Here  Becky P

I’m using a FTU Mask by Rocked By Rachel MaskSet-29_1
You can find all of her goodies

I had to up-size the template
Go into Image
Canvas Side
And up-size it to 700x700 it won’t mess with the main parts of the template it just gives you more room to work with, for the tag…
Background circle up-size by 125% and flood fill with paper7…
Frame right, frame left, frame Center frame flood fill with paper25…
Center ring, Right ring, left ring, flood fill with paper 29…
Left fill flood fill with paper22…
Center fill layer flood fill with paper 24…
Right fill layer flood fill with paper23…
Take the close up of your tube and re-size it by 25% make a new image with this..
Click on Right fill and paste the tube, and using magic wand tool, crop out what you wish to use of her face, do this on all 3 fill layers, mirror the one’s on the outside to face inside of the tag…
Click on Center fill crop out of the full size close up, her face and some of her kneck…
Re-size it to fit inside of the rings, using your magic wand, select what you wish to keep delete the other part you do not want to show outside of that circle layer…
Delete right and left grid off the template…
Click on left large fill paste E87 re-size by 35% pull so the far end show’s up at the top of the white boarder, crop out any showing outside of the frame, copy this and paste it above the right fill also…
Take E122 c/p above the left large frame re-size by 30% pull to match the top of the frame, copy this and paste over right large frame…
E89 c/p and re-size it by 50% pull to the left hand edge of your tag, take it mirror and paste it again on the right hand side. The waves will meet in the middle…
138 c/p re-size by 35% pull to the far left hand edge of your tag, take that re-sized version and paste mirror it on the right hand edge of your tag pull it up so none of it show’s under the circles in your tag…
110 c/p re-size by 45% pull to the right hand edge of your tag just in front of the tree, but where you can still see both…
Go back to the very top layer of your tag
114 c/p re-size by 40% pull to the far right hand side of your tag…
141 c/p re-size by 80% pull even with the middle circle…
33 c/p re-size by 35% pull to the lower right hand edge of your tag…
30 c/p re-size by 30% pull to the left hand edge of the lemons and limes…
18 c/p re-size by 30% pull it to the left of the fruit…
29 c/p re-size by 35% pull to the left hand edge of the lemons and limes…
24 c/p re-size by 45% pull to the very top of your tag…
145 c/p re-size by 35% pull to the lower left hand edge of your tag…
9 c/p re-size by 30% pull to the upper left hand edge of your tag…
10 c/p re-size by 30% pull it to the right hand edge of the yellow flower so it look’s like the bird is sitting on top of the flower…
142 c/p re-size by 50%
Add this drop shadow
Vertical 5
Horizontal 3
Opacity 75
Blur 5
Color black
Pull it to the far left hand edge of your tag…
Go to bottom layer flood fill with paper29 apply mask from above or what ever one you want to use, merge into one group up-size it by 110% add the same drop shadow we used earlier in the tag…

Thank you
©LadyDragus~2015

Tag for Rachel as a thank you for her masks
A Tag for the Template maker
BeckyP


Stores I Sell At

Ho-DG-150x150 rendeart-fan
All of my older kits are here Kits and Clusters Sold Separately BA-Blinkie-01

Forums

These have my permission to use my FTU kit for challenges and Cluster Frames for the Forums 2v2epcn-PMx-Am-EMC

Blog Trains for HODG

tk-oscrapblogtrain-blinkie MDblogtrainlinkie tk-Digital-CU-blinkie tk-Passion4-Scrapz-blinkie efrbt

Creative Teams

Irish-Princess-Blinkie2-vi Elvenstar-Art-Tube-Shop tk-Enchanted-Scraps-blinkie o-1hhk607u11a6rbbuecspgi1ibvc tk-Crystals-Creations-CTblinkie patty2-bybrandi1 tk-KZai-Show-blinkie Yudes-Kreationz