My Blinkies :)



Creative Fabrica

Creative Teams









Artists and Store I like
















Showing posts with label TPP-Store. Show all posts
Showing posts with label TPP-Store. Show all posts
Oct 13, 2015
Peaches and Cream

This tutorial is
written in Corel X5, but any version should work. It is written out of my own
mind and thought’s never meant to look like others.
I am using a PTU
Birthstone kit
By
Gimptastic Scraps
She sells at a few
store's, but you can find this exclusively
At The PSP Project
Here TPP~ The PSP Project

You can find the
other stores she sell’s at
I am using the PTU
artwork
Of
Barbara Jensen
You can find all of
her work, in her store
Here Barbara Jensen Tubes
I am using a FTU Mask
by Vix (Vix15)
You can find all of her
goodies
Here Vix PSP Madness
I am using the font
Saffron Too
You can find this on
most FTU sites…
Open a 675x675 size
tag, you can re-size later
Frame 2 c/p re-size
by 80%
Frame 1 c/p pull
behind frame 2, up-size by 105%...
Rose scatter c/p
mirror re-size by 70% pull to the left hand edge of your frame, some of your
tube will cover these…
Tree c/p mirror
re-size by 70% pull to the far right hand edge of your frame…
Bird c/p re-size by
55% pull to the top of the tree…
Take the close up
tube, of this package and re-size by 70% pull to the middle of the frames…
Sticks c/p rotate 90°
to the right pull to the left hand edge of frame, covering the bottom part of
your tube…
Moon c/p re-size by
70% pull to the lower left hand edge of tube…
Ribbon c/p pull to
the bottom hand edge of your frame, take the ribbon colorize it and paste a 2nd
time, mirror and pull to match up with the silver ribbon (yes Amy does allow
colorizations of the elements in her kits)…
Cross 2 c/p re-size
by 70% pull to the right hand edge of moon…
Angel c/p pull to the
very bottom edge of your tube re-size by 75%…
Flower 1 rotate 45°
to the right re-size by 65% pull to the left hand side of Angel…
Gem 1 c/p re-size by
55% pull to the right hand edge of paper rose…
Sparkle c/p pull to
the right hand edge of your tag…
GO to the bottom
layer of your tag, flood fill with paper 5 apply mask from above, I always add
a drop shadow of choice to make the mask stand out better…
Go to the top most
layer of your tag, add a new raster layer and your credit for the tube and kit
if required, add what ever saying you want on the tag and your done…
Thank you
LadyDragus ~2015
Tag for Kit maker and tube artist


Sep 30, 2015
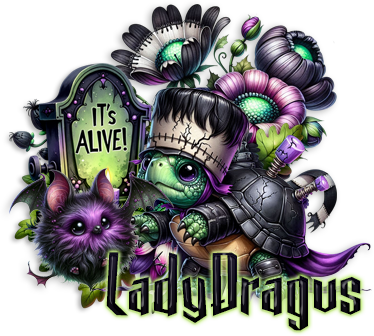
Halloween Witch Tube and Matching Kit


The tube is by Cute Loot
You can find this artist work

Here TPP~The PSP Project
I also got to play with the Matching kit
By Gimptastic Scraps

You can buy the tube and kit separate
*Bundle Details* here Halloween Witch Bundle
Amy sells at a few store's you can find them all on her blog
Here are the 2 set's of snags I made with the kit and tube


Tag's for kit maker


Jun 3, 2015
I got to play with this stunning kit and tube
Called Cowgirl

I used the lovely artwork of
Chris Delara
Here TPP~The PSP Project

This tube and kit can by bought
at the PSP Project in a bundle or by themselves
Link for Bundle TPP~Bundle of Cowgirl tube and kit

You can find out where Gimptastic Scraps sells at
Here Gimptastic Scraps
I made up 2 set's of snags for you
DO NOT alter my snags


Here are the tags for Amy


May 17, 2015

Mermaid Princess
This tutorial is
written in Corel X 5, but any version should work, it’s written in hopes you
have a working knowledge of Paint Shop Pro… This is never meant to look like
others work. Any resemblance to others is purely coincidental, and
unintentional…
I am using the a PTU
Kit
By Pink Paradox
Productions
Titled
Mermaid Princess

Carrie sells all of her kits in her own store
I am using the PTU
artwork
Of
KiwieFire Storm
You can get all of
his artwork


Here TPP~The PSP Project
Font of Choice I’m using
Gilder Girls
I am using a FTU Mask
by
Rocked By Rachel
MaskSet35_1
You can find all of
her goodies on her blog
Here RR~Rocked By Rachel
You will want a tube
that either has a close up, or you can make one and a full size also.
Open a 700x700 you can
re-size later…
Frame 1c/p re-size by
55% leave in the middle of your frame.
Take the close up and
paste behind the frame, pulling just her face showing through the frame, clean
off any extra showing behind the frame…
87 c/p re-size by 70%
pull to the bottom edge of your frame…
91 c/p re-size by 65%
pull to the bottom edge of your tag…
122 c/p re-size by
50% pull to the left hand edge of your frame…
126 c/p re-size by 40%
pull just in front of the grass…
114 c/p re-size by 50%
pull to the lower left hand edge of your tag…
113 c/p re-size by
35% pull to the bottom of plant…
84 c/p re-size by 30%
pull to the lower right hand edge of your tag…
31 c/p re-size by 25%
pull to sit on top of the flowers on the left hand edge of your tag…
61 c/p re-size by 25%
pull to the middle bottom of your tag…
51 c/p mirror re-size
by 25% pull to the right hand edge of your tag…
108 c/p re-size by
25% pull to the bottom left hand edge of your tag…
4 c/p mirror rotate
90° to the right re-size by 45% pull to the very top edge of your frame, on the
right hand side…
110 c/p re-size by
25% pull to the right of the shells…
Go to your bottom
layer of you tag flood fill with paper 18 apply mask from above, and add a
sharpen more to the merged layer, and this drop shadow
Vertical 5
Horizontal 3
Opacity 75
Blur 5
Color black
Go back up to top
most layer, add a new raster layer for you copyright’s and credit to kit maker
and artist.. Make sure you have a
License to use his artwork as it is copyright protected…
Thank you
©LadyDragus~2015
Tags for artist and mask maker


May 5, 2015
Samurai
I got to play with the kit and matching tube

Gimptastic Scraps
Samurai
With the matching tube by
Kiwiefire Storm
Both found at
Here TPP~The PSP Project


Preview of the Cluster Frame I made
Amy sells at a few stores, you can find them all on her blog

You can download the cluster
Here Samurai Cluster
Here Samurai Cluster
I also made a 2nd tag that I made snags out of
****Please do not alter my snags**

And here are the snags
These are not made with the cluster frame, just a secondary tag I made with the kit.


Tags for kit maker


Subscribe to:
Posts
(Atom)
Kit Match For


Stores I Sell At


Blog Trains for HODG






Forums

Blogs I follow