My Blinkies :)



Creative Fabrica

Creative Teams







Artists and Store I like


















Showing posts with label CT-MTA. Show all posts
Showing posts with label CT-MTA. Show all posts
Aug 13, 2015
Black Dragon Snags

Hello all I made up a set of snags that can go with the banners i made today
I used the PTU artwork of
Ariane Soares
You can find all of her work
Here MTA~MyTubedArt


I used a PTU Kit by Pink Paradox Productions
Called Vampire Romantique Silver
You can find all of her kits
Here are the snags



Hey i'm back to tagging..
Boy I sure missed it, but I needed the break
For my first CT Tag is one where
I used the wonderful artwork of
Ariane Sores
She sells all of her artwork
At
My Tubed Art
Here MTA~MyTubedArt
I also used 2 differnt PTU kit
By
Pink Paradox Productions
One is Touch the Rainbow
the second is Vamprie Romantique"Silver"
You can find both of these and all of her kit


Artists and MTA banners


Jun 22, 2015
Mermaid

This tutorial is
written in Corel X5, but any version should work, it’s written in hopes you
have a working knowledge of paint Shop Pro, or other graphics program…
I am using a PTU tube
by
Terra BIdlesparcher
You can find all of
her work at
MyTubedArt
Here MTA~MyTubedArt
I am using a FTU Kit
By Kandii Popz


You can find this on
her blog
This kit is part of
the Fantstically Free Blog Train this month
Here Just Beachy
I am using a FTU
Template by
Dee (Template
Mermaid)
Remove the background
layer and the font info and credit layer
Mermaid blue I am
colorizing it a brown from the tube, you can choose a different color to match
your tube or kit….
Mermaid white I
negative imaged that layer to make it black…
Then merge those two
layers into one, and then the drop shadow also
Be your own kind of
with a gradient glow of brown, and merge that layer down onto the drop shadow
of it the words…
Inner blue and outer
blue layer flood fill with a brown from the tube…
Frame one c/p 60%
Pull even with the outer blue ring, add this drop shadow
Vertical 5
Horizontal 3
Opacity 60
Blur 5
Color black
Top Wheel Go into
Eyecandy 4000 and use the Bevel Boss
With these settings
for the Basic

Bottom Wheel flood
fill with a brown color from the tube…
Center purple flood
fill with paper 5…
Sand c/p above the
Center purple layer re-size by 60% clean off any that show’s outside of the
wheel layer
Take your tube paste
and re-size by 65% pull to the bottom edge of sand…
Using your Picture
tube tool add some bubbles and colorize them blue re-size by 55% I pasted it 3
times...
Merge the bubbles
into one layer
Aqua Square flood
fill with paper 1
Go to the layer of
the frame 1 c/p grass and re-size by 65% pull to the lower left hand edge of
the frame clean to make it look like it’s coming out of the frame…
Tree 2 c/p re-size by
60% pull to the left hand edge of grass…
Hut c/p re-size by
50% pull to the lower right hand edge of tag behind the aid in Mermaid…
Seagulls c/p re-size
by 35% pull to the right
Anchor c/p on top of
the Mermaid layer rotate 45° to the right and re-size by50%...
Shell 2 c/p re-size
by 35% pull to the right hand edge of anchor…
Seagull c/p re-size
by 55% pull to the upper left hand edge of your tag add the drop shadow from
above….
Bed c/p re-size by
25% mirror and pull to the lower left hand edge of tag…
Ball c/p re-size by 30%
pull to the left hand edge of bed…
Bottle c/p re-size by
25% pull to the right hand edge of ball…
Shell 3 c/p re-size
by 25% pull to the lower right hand edge of your tag…
Tags for artist and kit maker


Tags for artist and kit maker


May 17, 2015
I got to play with a beautiful tube by
Sarah Bennett, from My Tubed Art

And I got to pick a stunning kit by

I got both of these because i'm a Creative Team Member
With My Tubed Art
You can find both of these arist's and kit makers
And Many others
Here MTA~MyTubedArt

I also used a different kit for the 3rd set of snags I did
By Crystals Creations
Called Rainbow Fantasy

You can find out where Crystal Sells at
Here Crystals Creations

I made up 3 set's of snags
Here they are, Please do not alter my snags


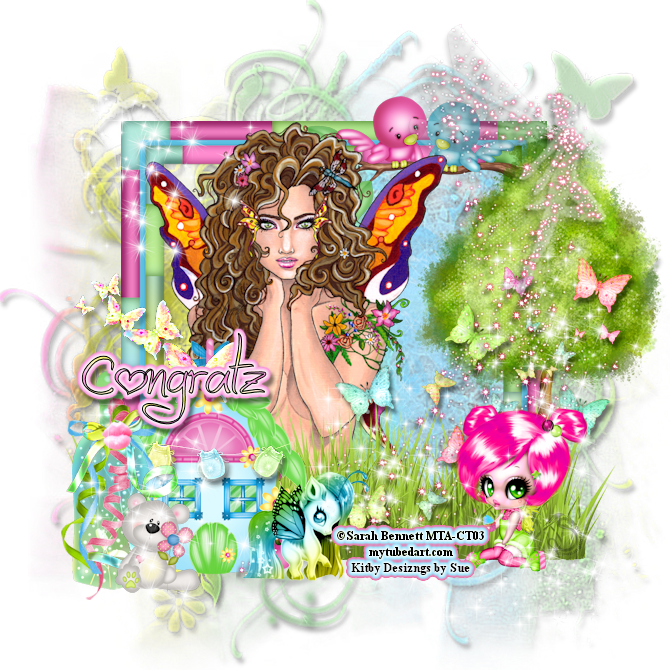


Thank you for looking at my snags
Again Please do not alter these in anyway..
Thanks
LadyDragus
May 6, 2015

Mermaid
By LadyDragus
This tutorial is
written in Corel X5, but any version should work,its written in hopes you have
a working knowledge of Paint Shop Pro…
It is also written
out of my own mind and thought’s never meant to look like yours, or others work.
I am using the PTU
artwork of
Tony Mauro

Who sells his artwork
at
My Tubed Art
Here MTA~My Tubed Art
I am using a PTU kit
Pink Paradox
Productions
Called Sea of Enchantmen

She sells all of her
kits
I am using the font
Arabolical Font it can be found at any FTU Font site
Open a 700x700 size
tag, you can re-size it later
Frame13 c/p re-size
by 60% leave in the middle of your tag…
Open paper16 c/p
re-size it by 60% pull it up so the blue fish on the bottom of the pick can be seen,
using your magic want crop out that scene and delete the rest of the paper…(do
this which ever way you wish to crop out the image)
13 c/p pull to the
upper right hand edge of paper, re-size by 20%...
71 c/p mirror re-size
by 20% pull to the bottom edge of E13…
82 c/p re-size by 75%
pull to the bottom edge of your frame…
129 c/p re-size by
45% pull to the lower left hand edge of your frame…
Take your tube, there
is only one size paste pull her to make it look like she is sitting on the
flower…
95 c/p re-size by 45%
mirror and pull to the far right hand edge of your tag…
26 c/p re-size by 30%
pull to the far right hand edge of your frame so it looks like it climbing up
the pillar…
89 c/p re-size by 40%
pull to the far left hand side of your tube…
7 c/p re-size by 30%
pull to the left hand side of mermaid, on top of her tail…
138 c/p re-size by
30% pull to the far right hand edge of your tag…
94 c/p re-size by 20%
pull to the left hand edge of the gold looking seashells…
67 c/p re-size by 20%
pull to the front of mushrooms
5 c/p mirror re-size
by 30% pull to the far left hand edge of your tag…
38 c/p re-size by 55%
pull in front of the snails…
174 c/p re-size by
55% pull so it covers the tube, then mirror it and pull it to the right hand
edge of your tag also…
Go to the very top
raster of your tag, make a new one add your copyright and make sure to give
credit to the kit maker..
Thank you for
reading/doing my tutorial
I hope you enjoyed
it..
©LadyDragus~2015
Tag for artist and kit maker


Apr 23, 2015

Fairy Love
This tutorial is
written In Corel X5, but any version should work.
This is written in
hopes you have a working knowledge of Paint Shop Pro, or other graphics
program…
This is written out
of my own thought’s never meant to copy, or look like others…
I am using the PTU
Art work
Of Bit’s and Bobs
And I’m also using
one of her PTU Kits
Called Fantasia and
the tube is called Fairy belle
I am using the Close
up version not the full size…
I got this tube and
kit
By being on the My
Tubed Art Creative Team
Here MTA~My Tubed Art
I am also using a FTU
Template
I made up today for
this tutorial
Called Fairy Love
You can download it
on my blog
Here Fairy Love Tempalte
It is a 700x700 size tag,
I’m merging my
Rectangle border and the drop shadow into on layer…
On the flower brush
add a drop shadow with a pink form one of the papers
With this settings
Vertical 5
Horizontal 5
Opacity 100
Blur 10
Color pink
Word art 1 and word
art 2 add a gradient glow
With the setting in
the pic below
Add a drop shadow of
Vertical 5
Horizontal 3
Opaicty 100
Blur 5
Color black
Circle flood fill
with paper10
Middle oval paper6
Rectangle layer flood
fill paper9
Rectangle layer, take
3 colors of the close up, paste and re-size by 60%, crop the face off of each
tube and pull them to cover the 3 rectangles…
I am mirroring one of
the close-up’s to make it face towards the right instead of the left…
Click on Rectangle
border
Open ribbon4 c/p flip
vertical, pull to the upper right hand edge of right border…
Brush layer,
Open ribbon-2 c/p and
crop off any that does not say inside of the frames…
Bling-2 c/p re-size
by 10% pull to cover up the edge’s of pink ribbon, copy and paste on the other
side where you have one on left and right…
Flower Gem2 c/p pull
to the top middle of the multicolored ribbon…
Heavenly bling2 c/p
re-size by 10% pull to the upper right hand edge of the same ribbon…
Flower2 c/p pull to
the middle bottom of the middle rectangle…
Click on Word Art 2
paste Dove-3 so it looks’s like it is sitting on top of the words…
Click on Middle Oval
C/p diamond rain 2 re-size by 50% pull it so it’s inside of the oval…
Circle border c/p
bubbles-3 pull to the upper right hand edge of your layer, then paste again on
same layer, mirror and pull to the bottom left hand side of that layer…
Click on the upper
top most layer paste sparkles-1 and re-size by 70% pull to the lower right hand
edge of tag…
Now make a whole new
raster layer, to put your copyright for the tube and kit, same person, and your
LIC# make sure you use that on all of her tags..
Thank you, for
reading/doing my tutorial
©LadyDragus~2015
Tags for Kit maker/poser maker
and the store


Apr 6, 2015

Spring Candy Fairy
This tutorial is
written in Corel X5, but any version should work.
It is written out of
my own thought’s and words, never to look like others.
I am using a PTU Kit
By
Pink Paradox Productions
Pink Paradox Productions
Called
Spring Fantasy

Carrie sells all of
her kit in her own store
I am using the cute
artwork of
Ina Spicer
She sells her artwork
at
MyTubedArt
Here MTA~My Tubed Art
I am using a FTU Mask
by
Rocked By Rachel
(Mask Set10-3)
Here Rocked By Rachel
Open a 700x700 size
tag you can re-size later
Frame 1 c/p re-size
by 60% leave in the middle of your tag…
Frame5 c/p re-size it
by 70% pull it behind the white frame, so it look’s like it is coming out
behind the frame, then add a sharpen to the element…
124 c/p re-size by
55% pull to the right hand edge of your tag…
114 c/p re-size by
25% pull to the lower right hand edge of tag, on the left of the pink mushroom…
118 c/p re-size by
45% pull to the left hand edge of your frame…
123 c/p re-size by
50% pull to the middle of the purple flowers…
76 c/p re-size by 50%
pull it to the lower right hand edge of your tag…
46 c/p re-size by 25%
pull to the middle right of mushroom, so it is hanging off it…
59 c/p re-size by 30%
pull to the lower left hand edge of your tag…
Take your tube paste
and pull it to the upper right hand edge of your tag…
3b c/p re-size by 25%
pull to make it look like it’s sitting on top of the pink mushroom on the right
hand edge of your tag…
38 c/p re-size by 45%
pull to the lower left hand edge of tag, in front of the pillows…
9 c/p mirror re-size
by 40% pull him even with the open pink flower on the left hand edge of your
tag, it will look like it’s drinking of the flower…
98 c/p mirror re-size
by 50% pull to the lower right hand edge of your tag…
14 c/p re-size by 45%
pull to the right hand edge of tag, add this drop shadow
Vertical 5
Horizontal 5
Opacity 75
Blur 5
Color black
Go to the very bottom
raster layer of your tag flood fill with paper 42 apply the mask from above or
one of you choice merge into one layer
up-size by 105% add a sharpen
more to the layer…
Go back to the top
most raster of your tag, add a new one, to add your copyright and credit for
kit maker since she does require it…
Tag for mask maker store and artist


Subscribe to:
Posts
(Atom)
Kit Match For


Stores I Sell At


Blog Trains for HODG






Forums


Blogs I follow


.gif)


















