My Blinkies :)



Creative Fabrica

Creative Teams







Artists and Store I like
















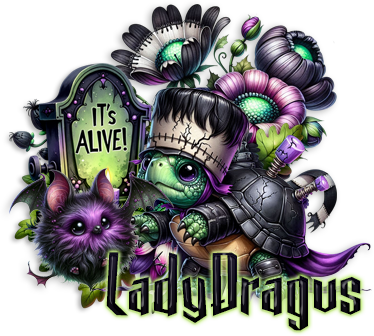
MoonStone Love Spell

This tutorial is written in Corel 2023, but any version should work, this is written in hopes you have working knowledge of Paint Shop Pro or other graphics program… this is written by me, never meant to copy or look like your work…
I am using a PTU kit
By Happy Pumpkin Studio
Called MoonStone love Spell

You can find it
Here Moonstone Love Spell
I am using a PTU tube
By Foxfoggydog

You can find it
Here Jade
Mask Mask Mass Download
SophisticSimone_0273
If you only want to download the set Masks
Open a 750x750
Frame 1 c/p size this down by 50%
119 c/p size this down by 38% pull behind the frame
Click on top most layer of your tag
11 c/p size this down by 29% pull to the lower left edge of the frame
55 c/p size this down by 19% pull to sit on left edge of the rose
c/ the colorized version of the tube we are using, then size this down by 24% put the tube on the rose/books
81 c/p size this down by 33% pull to the upper left of your frame
8 c/p size this down by 23% pull to the upper right top of your frame
26 c/p size this down by 11% pull up to her hand , make it look like she is holding the wand, (do this however you think will look best)
199 c/p mirror then size this down by22% pull to sit by her feet
25 c/p size this down by 10% pull the black dragon so he is sitting on her legs, then mirror him
40 c/p size this down by 12% pull to sit on middle of the tube on the ground
15 c/p size this down by 15% pull to the bottom right edge of the frame
201 c/p size this down by 15% (add a high pass sharpen) pull so this is sitting on the right edge of your tube
21 c/p size this down by 14% pull to sit on right side of the pumpkin
152 c/p mirror size this down by 15% pull so she is walking by the other dragon on left edge of your tag
102 c/p rotate 45° to the left, then size down by 12% pull to fly above the rose, on bottom right of your tag
118 c/p size this down by 12% pull to sit by the rolls on bottom right
150 c/p size this down by 12% pull to sit on left side of the pumpkin
92 c/p size this rose down by 9% pull to sit in front of the pumpkin
160 c/p size this down by 9% pull to sit on far right of black snake, on right side of the tag
233 c/p size this down by 9% pull it to sit on left side of the snake on left of the tag
234 c/p size this down by10% pull to the upper right top of the word witch
Click on the bottom layer of your tag open paper 78 size this down to fit the canvas, then apply mask from above, merge into one layer.
Click on top most layer add a new raster layer for your copyrights and credit to arist and kit maker, add a saying to the tag and your done…
Thank you for reading my tutorial
©LadyDragus~2025




Jade

This tutorial is written in Corel 2021, but any version should work, this is written in hopes you have working knowledge of Paint Shop Pro or other graphics program… this is written by me, never meant to copy or look like your work…
I am using a PTU kit
By Designs By Ketura
Called Jade, this is a match for a tube
by Foxfoggydog of the same name

You can find the kit
Here DBK~Jade Kit

The Tube
Here Jade Tube
Open 750x750
Frame 1 c/p size this down by 85%
37 c/p pull to the sit in the middle of the frame
49 c/p size this down by 50% pull to right edge of the tree
25 c/p mirror size this down by 50% pull to sit on right edge of other mushrooms
10 c/p size down by 60%, then pull to the bottom of the frame
66 c/p mirror size this down by 60% pull to sit on right edge of the stump
Take the colorized version of the tube we are using, paste her size her down by 20%,pull so she is sitting on top of the log
58 c/p pull the 1st one to sit in front of your tube, take a 2nd mirror it, then pull to sit on ground on the bushes
73 c/p size this down by 15% pull to sit in front of bushes
43 c/p size this down by 25% pull to sit on ground in front of the tube
44 c/p size this down by 15% pull to sit on top of the tallest mushroom
48 c/p size this down by 25% pull to sit on left edge of the grass in front of the tube
Click on the bottom of the tag, 41 c/p leave as it falls on the tag
Click on top layer of the tag, make a new raster layer, for the credits and license number for the tube, add a saying to the tag and you’re done…
Thank you for reading my tutorial
©LadyDragus~ 2023


Hawiian Party

This tutorial is written in Corel 2021, but any
version should work, this is written in hopes you have working knowledge of Paint Shop Pro or other
graphics program… this is written by me, never meant to copy or look like your
work…
I am using an Exclusive kit
By Mythical Designs
Called Hawiian Style


This is to match a tube by
Foxfoggydog
Sold only
Here Amber~FoxFoggyDog


Font Aerofoil
Open a 750x750
E67 c/p leave as it falls on the tag, duplicate merge
into one layer
Frame 4 c/p size this down by 60%
E59 c/p then
pull it behind the frame
E44 c/p, then pull to the bottom of the frame
E38 c/p size this down by 60% pull to the right edge
of the frame
E2 c/p size this down by 55% pull so the top of the
tree show’s over the frame
E39 c/p size this down by 60% pull to the left edge of
the frame
Take the colorized version of the tube we are using,
c/p size her down by 25% pull to the middle of the tag
E52 c/p size this down by 44% pull to the left edge of
the sand
E21 c/p size this down by 35% pull to sit on left edge
of your tube
E76 c/p size this down by 34% pull to the right edge
of your tube
E25 c/p size this down by 35% pull to sit on right
edge of the bottle
E34 c/p size this down by 34% pull to sit by the beach
bag
E51 c/p size this down by 30% pull to the middle of
your tag
E73 c/p size this down by 25% pull to sit on bottom of
the drink
E65 c/p mirror size this down by 50% pull to sit on
top of bottle
Add a new raster layer to your tag, for your
copyrights and credit to kit maker; then add a saying to the tag and you’re
done…
Thank you for reading my tutorial
©LadyDragus


Kit Match For


Stores I Sell At


Blog Trains for HODG






Forums

Blogs I follow