My Blinkies :)



Creative Fabrica

Creative Teams







Artists and Store I like




















Snow Morning

This tutorial is written in Corel 2021, but any version should work, this is written in hopes you have working knowledge of Paint Shop Pro or other graphics program… this is written by me, never meant to copy or look like your work…
I am using a PTU kit
By PortugueseGirl Designs
Called Snow Morning

Here Elida ~ Snow Morning matching kit
This is also an exclusive kit to Elegancefly, to match the tube
By Sheokate Called Elida

The Tube
Here Elida
I am using a FTU mask by
WSL_310
Open a 750x750
Open paper 11 size this down to fit inside of the canvas, then apply mask from above
23 c/p size this down by 80% pull this to the mask layer pull so some of it is hidden on the right edge of t he mask
40 c/p size this down by 60% pull inside of the mask above the bridge, then pull to the far left edge of the mask
11 c/p size this down by 70% pull to sit on right edge of the bridge, on the outside of the mask
90 c/p size this down by 60% pull to sit on the left edge of the wooden bridge
84 c/p size this down by 44% pull to sit at left edge of snow
Take the colorized version of the tube we are using #5 c/p size her down by 16% pull to sit in the middle of the snow
1 c/p size this down by 60% pull to the bottom edge of the tube
85 c/p mirror size this down by 35% pull to sit on left of animals in snow
78 c/p mirror size this down by 34% pull to sit on tree stump on left side
100 c/p size this down by 34% pull to sit in front of rabbit
19 c/p size this down by 15% pull to stand in front of wagon wheels
87 c/p size this down by 18% pull to sit on left edge of snow
86 c/p size this down by 18% pull to right of blue mushroom
26 c/p size this down by 22% pull to sit on right edge of the mushrooms
69 c/p size this down by 25% pull to stand in front of the animal on the sled
65 c/p size this down by 15% pull to stand on right side of lantern
39 c/p size this down by 15% pull 1st copy to sit on mushroom in front of the bunny girl, a second one in front of little cow, and the 3rd in front of the wagon wheels
46 c/p size this down by 15% pull to sit in front of coco in front of wagon wheels…
Add a new raster layer for the copyrights and credit to kit maker, make sure you have a valid License to use this person artwork, add a saying to the tag and you’re done…
Thank you for reading my tutorial
©LadyDragus~ 2022



Spider Witch

This tutorial is written in Corel 2021, but any
version should work, this is written in hopes you have working knowledge of Paint Shop Pro or other
graphics program… this is written by me, never meant to copy or look like your
work…
I am using a PTU kit
By Mythical Desgins
Called Spider Witch

You can find her kits
WSL_HalloweenMask2
Font: Spiderfingers
Open a 750x750 size tag
Frame 3 c/p size this down by 70%
66 c/p size this down by 75% pull to the left edge of
your frame
Take tube 2 c/p size her down by 15% pull to sit on
right edge of the house.
44 c/p size this down by 75% pull to sit on bottom of
your tube
38 c/p size this down by 50% pull to the right edge of
the ground
19 c/p size this down by 26%pull to sit on top of
books
40 c/p size this down by 40% pull to sit on left edge
of the books
18 c/p mirror size this down by 50% pull to sit in
front of the house .
22 c/p size this down by 26% pull to sit by black cat
23 c/p size this down by 25% pull to the right of
other bottle
31 c/p size this down by 25% pull to sit on right edge
of books
11 c/p size this down by 25% pull to sit on left edge
of blue bottle
37 c/p size this down by 25% pull to sit on right of
cauldron
56 c/p size this down by 25% pull to sit under pink
bottle on books
48 c/p size this down by 25% pull to sit on left side
of cauldron
Click on bottom layer of your tag take paper 12 size
to fit a 700x700 canvas(this is what I size my tags down to) apply mask from
above, merge into one layer..
Click on top most layer of the tag add a new raster
layer for the credits and your saying on the tag.
Thank you for reading my tutorial
©LadyDragus~ October 2022


Up on High Angel Fly
This tutorial is written in Corel 2021, but any
version should work, this is written in hopes you have working knowledge of Paint Shop Pro or other
graphics program… this is written by me, never meant to copy or look like your
work…
I am working with a PTU kit
By PortugueseGirl Designs
Called Beyond Imagination


You can find this in all of her stores
I am using a PTU tube
By Sheokate
Named Elvira I am using the extended version on this
tube

Found
Here Elvira ~Elegancefly
Open a 800x800
53 c/p size this down by 75%
70 c/p size this down by 55% pull to the middle of the
archways the top will float over them
42 c/p size this down by 55% pull to the far left edge
of archways
Take the tube we are using with the color you want I
went with pink flowers and pink wings sliver elements
108 c/p size this down by 25% pull her to float above
the stairs
38 c/p size this down by39% rotate 40° to the right
pull to sit on far left edge of the clouds
68 c/p size this down by 35% rotate 40° to the right
pull to sit on bottom of other pink flowers
37 c/p size this flower down by 40% pull to sit on the
dress on our tube
55 c/p size this down by 40% duplicate this 2 times,
merge into one layer pull to hang over the back part of the tube
28 c/p size this down by 60% pull to the bottom of
pink flowers and in front of the tube , her knee will be somewhat hidden
76 c/p size this down by 45% pull to sit on top of
cloud in front of tube
58 c/p size this down by 35% pull to the upper right
edge of the tag
61 c/p size this down by 25% pull to right edge of the
castle
45 c/p mirror size down by 25% pull to the upper left
purple branches on archways
95 c/p size this down by 25% pull to fly above the
left pink flower
87 c/p size this down by 25% pull to the sit on left
edge of castle
Click on bottom layer of the tag (this is also where I
size the tag down by 700x700 pixels, always do this before adding copyright
layer so that is still readable
14 c/p 4 times around the back of the tag, this will
be our background layer.
Click on top most layer of your tag
Add a new raster layer for the copyright and credit to
kit maker, add a saying to the tag and you’re done…
Thank you for reading my tutorial
©LadyDragus~ 2022


Lavender Melancholy

This tutorial is written in Corel 2021, but any
version should work, this is written in hopes you have working knowledge of Paint Shop Pro or other
graphics program… this is written by me, never meant to copy or look like your
work…
I am using a PTU kit
By Irish Princess Designs
Called Lavender in Provence

You can find her kits
**she has only 2021 and 2022 kits in this store**
I am using the PTU artwork
Of
Called Night time Melancholy

You can find her work
Vix mask 345
Here Vix PSP
Open a 750x750
Frame 3 c/p size this down by 49%
Take the layer tube no petals no moon c/p size t his
down by 86% pull to sit in inside of the frame on right side
E52 c/p mirror size this down by 35%
E82 c/p size this down by 35% pull to the right side
of the frame
E55 c/p size this down by 35% pull sot sit on right
edge of lavender
Move E52 up to the middle of the frame
E187 c/p size this down by 69% pull to the bottom of
the frame
E33 c/p size this down by 25% pull to the lower left
edge of the tag
E92 c/p size this down by 16% pull to lean on books
E6 c/p size this down by 11% pull to sit by note cards
E27 c/p size this down by 12% pull to sit in front of
books
E45 c/p size this down by 23% pull to the right edge
of the tag
E161 c/p size this down by 10% pull to sit by pot of
lavender
E130 c/p size this down by 10% pull to sit in between
other two bottles
E7 c/p size this down by 10% pull to the upper left
edge of the frame
Click on bottom layer of your tag
Open paper 8 flood fill apply mask from above, merge into one layer…
Click on top most layer of the tag add your copyrights
for artist and kit maker, make sure you have a valid Zindy License number , add
a saying to the tag and you’re done…
Thank you for reading my tutorial


Rose

This tutorial is written in Corel 2021, but any
version should work, this is written in hopes you have working knowledge of Paint Shop Pro or other
graphics program… this is written by me, never meant to copy or look like your
work…
I am using a PTU kit
By PGD Called Rose
This also match’s a tube
by Sheokate Rose tube

You can find the kit
Here ~EX~ Rose

You can find the tube
Here ~Sheokate~ Rose
RachelMask Set 31-4
Here Rachel Designs Wordpress blog
Drop shadow (DS)
Vertical 10
Horizontal 6
Opacity 65
Blur 10
Color black
Open a 750x750 size tag (size down at the end)
Open paper 18 size this down to fit inside of your
canvas paste
I’m using a mask by Rachel (Above) apply the mask to
the paper layer merge the group
E42 c/p size this down by 65%
Take the colorized version of the tube we are using
paste her size her down by 25% pull to the middle of archway, and then pull it
inside of the mask layer of your tag
E116 c/p size this down by 65% pull to the bottom of
archway, just at the bottom of the tube
E14 c/p size this down by 44% pull to the left edge of
tube
E4 c/p size this down by 44% pull to the left edge of
archway
E98 c/p mirror size this down by 44% pull to the right
edge of archway
E8 c/p size this down by 44% pull to the upper right
edge of archway, add DS from above
E18 c/p size this bird down by 25% pull to sit on top
of cage w/ skull
E15 c/p size this down by 15% pull to sit in front of
gargoyle
E1 c/p size this down by 28% pull to sit on left edge
of mushrooms
E12 c/p size this down by 28% pull to sit on right of
glass w/body
E5 c/p size this down by 15% pull to sit in front of
tombstone
E113 c/p size this down by 22% pull to sit on left
edge of tombstone
E36 c/p size this down by 22% pull to sit on right of
mushrooms
E47 c/p size this down by 30% pull to fly over the
tombstone
E40 c/p pull so it is over the tube in the middle of
your tag
Add a new raster layer for the copyrights; add a
saying to the tag and you’re done…
Thank you for reading my tutorial
** when showing off a tag you make with this tutorial
only use the copyright for the tag you are using and credit to the kit maker,
Never put copyright and my tutorial link, this is against any artist TOU
Thank you for understanding **
©LadyDragus~ February 2022
Tags for kit maker and mask maker


Angel Elvira

This tutorial is written in Corel 2021, but any
version should work, this is written in hopes you have working knowledge of Paint Shop Pro or other
graphics program… this is written by me, never meant to copy or look like your
work…
I am working with a PTU kit
By MoonVixen Designs

You can find her kits
I am using a PTU tube
By Sheokate Called Elvira
* I am using the extended tube so it has many layers*

You can find her tubes
Here ~Elvira Tube ~ Elgancefly
Drop shadow for this tag
Vertical 10
Horizontal 3
Opacity 60
Blur 4
Color black
WSLMask 327
Open 750x750 size tag
Frame 4 c/p size this down by 70%, then add drop
shadow from above
E148 c/p size this down by 50% pull to the top of your
frame
E59 c/p size this down by 80% pull to the top of the
frame, add a drop shadow form above
E47 c/p size this flower down by 35% pull to the left
edge of your frame
E7 c/p size this down by 50% pull to the lower left
edge of the frame , just in front of blue/purple flowers
E23 c/p size down by 35% pull to sit on the right edge
of the stump
E16 c/p size this down by 37% pull to sit on left edge
of stump
E74 c/p size this down by 32% pull to sit just above
the blue flower, then pull behind them
E13 c/p size this down by 25% pull to sit on right of
blue flowers
Take the colorized version of the tube we are using, I
made her color’s to match the kit size her down by 15% pull to the lower right
edge of the frame
E66 c/p size the deer down by 35% pull to sit in front
of tube
E72 c/p mirror size the frog down by 23% pull to just
the left of deer
E109 c/p size down by 30% pull to the right edge of
tube
E107 c/p size down by 30% pull to just the right of
the deer
E108 c/p then size this down by 30% pull to sit
between the other glass
E159 c/p then size the bird down by 30% pull to the
upper right of the tag, then add drop shadow from above
E21 c/p then size the butterfly down by 30% pull this
to the upper left edge of your tag
E93 c/p size the dragon down by 35% pull to the left
edge of the tag
Click on bottom layer of your tag
Flood fill this layer with paper3 apply the mask from
above, or one you like better, merge into a group layer
Click on top most layer of your tag add a new raster
layer, for the copyrights and credit to kit maker, add a saying to the tag and
you’re done…
Thank you for reading my tutorial
©LadyDragus~ September 2021
Tag for artist


Autumn Splendor

This tutorial is written in Corel 2021, but any
version should work, this is written in hopes you have working knowledge of Paint Shop Pro or other
graphics program… this is written by me, never meant to copy or look like your
work…
I am working with a PTU kit
By Angel Wing Scraps
Called Autumn Splendor
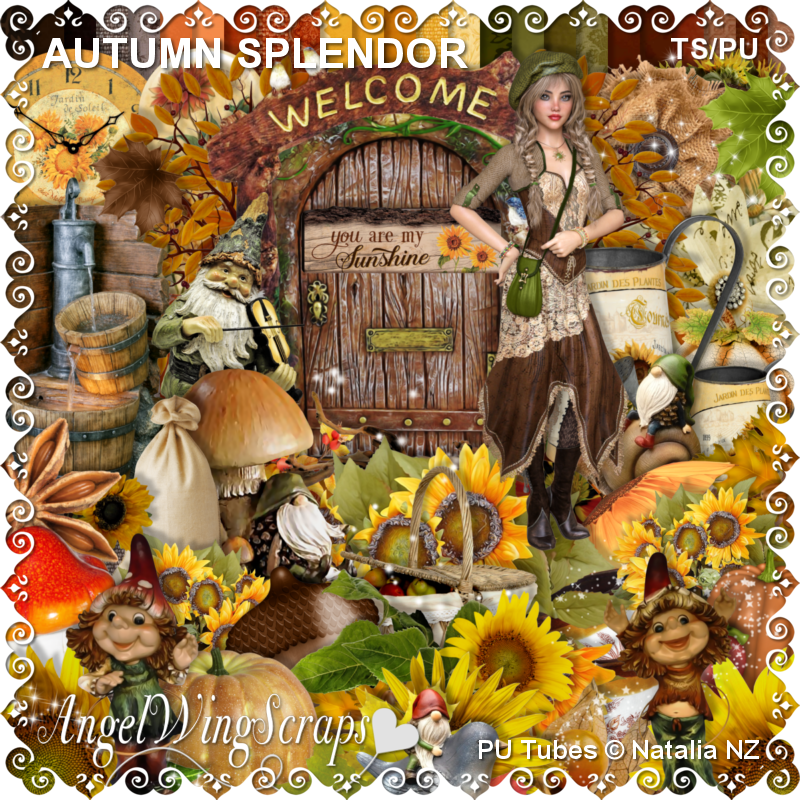

You can find her kits
I am using a PTU tube
By Sheokate called Alessa
* I am using the extended tube*

You can buy the tube
Here Alessa Tube
Open a 750x750 size tag
E113 c/p size this down by 60%
E23 c/p mirror size down by 60% pull to the far right
edge of the frame
E72 c/p mirror size down by 50% pull to the left edge
of your frame
E106 c/p size this flower down by 50% pull to the
right edge of sunflowers
Take the colored version with the elements you want on
the tube, I’m using the mushroom and apples in her hands paste this tube then
size her down by 14% pull to the right edge of your tag
E58 c/p size this down by 25% pull to sit on left edge
of the tube
E13 c/p size the gnome down by 25% pull to sit on left
of pumpkin
E70 c/p size down by 25% pull to sit on right edge of
tube
E4 c/p size this down by 25% pull to stand in front of
apple
E109 c/p size the wood down by 25% pull in front of
gnome
E78 c/p size this sunflower down by 50% pull to sit in
front of tube
E64 c/p size this down by 25% pull to sit in front of
the green on sunflower
E7 c/p size this gnome down by 21% pull to stand on
left of gnome and mushroom
E6 c/p size this down by 21% pull to stand on right of
wood
E5 c/p size this down by 21% pull to stand on right of
girl
E16 c/p size this down by 22% pull to the right of
sunflowers
E20 c/p size the butterfly down by 22% pull to the
upper left of the frame
Click on bottom layer of your tag
Open paper 12 using yoru circle tool, draw a circle
behind the frame make this a raster layer.
Click on top most layer of your tag add a new raster
layer for the credits for tube and kit maker, add a saying and your done
Thank you for reading my tutorial
©LadyDragus~ September 2021
Tag for kit maker and artist


Kit Match For


Stores I Sell At


Blog Trains for HODG






Forums


Blogs I follow


.gif)


















