My Blinkies :)



Creative Fabrica

Creative Teams









Artists and Store I like
















Showing posts with label JoelAdamstube. Show all posts
Showing posts with label JoelAdamstube. Show all posts
Jul 10, 2016
My Happy Place

This tutorial is written in Corel X5, but any version
should work.. It’s written in hopes you have a working knowledge of Paint Shop
Pro or other graphics program…
I am using a PTU kit
By
Gimptastic
Scraps
Called
My Happy Place

This kit can be found in her store
At Creative Design Outlet
She also sells at more store’s you can find them all
listed on her blog
I am also using the PTU artwork
Of
Joel Adams I got these tubes when he was with CILM
But he is now licensed with CDO
Here CDO~Joel Adams
I am using a FTU mask by Rachel’s Designs
You can find them all on her blog (Maskset68-1)
here Rachels Blog
here Rachels Blog
Open a 725x725 size tag you can re-size it later..
Frame3 c/p re-size by 80% leave in the middle of the
tag…
Frame 4 c/p pull behind the other frame; re-size by
90% pull so it shows’s all around the other frame…
E53 c/p re-size by 75% pull to the far right hand edge
of your tag…
E52 c/p then pull it even with the bottom edge of your
frames…
Take your tube ( a sitting one or kneeling one works
best) pull her to the right hand edge of your tag put her like she is sitting
on the napkin, re-size as needed mine did not need it…
E11 c/p re-size by 70% pull to the left hand edge of
your tube, by her knees…
E13 c/p re-size by 50% pull to the far right hand edge
of your tag…
E3 c/p rotate 90° to the right pull even with the
water bottle…
E5 c/p re-size by 75%, then mirror and pull to the
right hand edge of cherries…
E1 c/p re-size by 65% pull to sit by her knee…
E2 c/p re-size by 55% pull to the left of the apple…
E9 c/p rotate it by 35° re-size by 65% pull to the
upper left hand edge of your frames…
E20 c/p mirror rotate 35° to the right pull to make it
sit on the bottle lying on its side…
E21 c/p re-size by 50% pull to the far left hand edge
of your tag…
E26 c/p rotate it by 90° to the right re-size by 45%
pull to the left of red flower…
Go to the bottom layer of your tag, flood fill with
paper5 apply the mask from above or one of your choice…
Go to the upper top most layer of your tag and add a
new raster layer for your credits and give the kit maker credit…
Thank you for reading my tutorial
©LadyDragus~2016~
Tag for kit maker artist and mask maker


Mar 7, 2016
Wonderland
We all want to go there, if only for a day

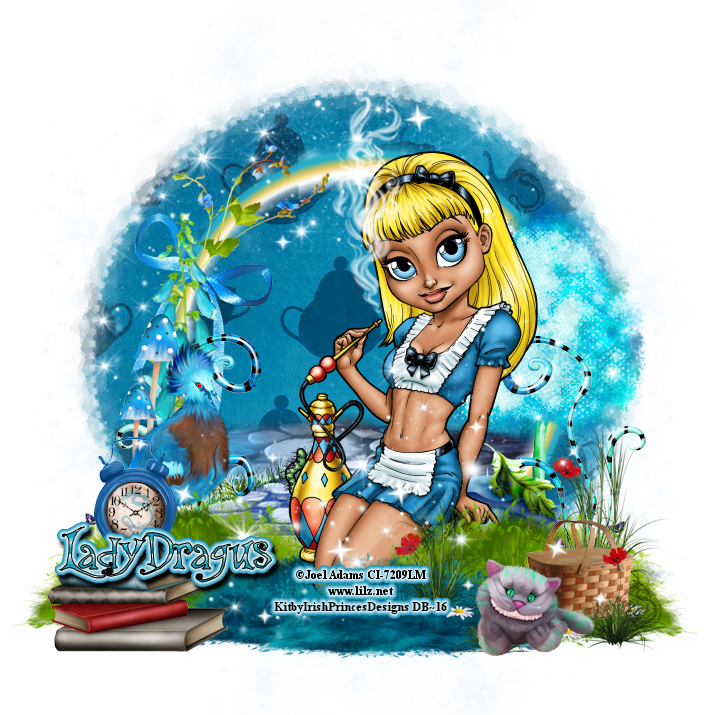

Wonderland is a PTU Kit
By
Irish Princess Designs
You can find all of her stores
But her Clusters can only be found at
Smileys Creations Here Smileys Creations
Or
Hania's Designs
Here Hanias Designs
Here is a preview of the kit and clusters


Sep 13, 2015

Happiness
This tutorial is
written in Corel X5, but any version should work. It is written out of my own
thoughts and words. Never meant to copy or look like others.
I am using a PTU kit
By
Wicked Princess
Called “Happiness”

Shani sells at a few stores
You can find them all on her blog
Here Wicked Princess
I am using the PTU
artwork
Of Joel Adams
I got this set of
tubes when he was with CILM
But you can now get
all of his tubes
@ Creative Design Outlet
I am using a FTU
Template by
Millies PSP Madness
Temp 347
You can find all of
her templates
Here Millies PSP Madness
I upsized the canvas
size to 700x700 I removed the word art as it did not match the kit….
Delete the background
layer (just the white part)
Raster 1 flood fill
with paper 5
Raster 2 flood fill
with paper 6
Raster3 flood fill
with paper 19
Raster 4 flood fill
with paper 11
Raster 5 flood fill
with paper 20
Merge raster 6&7
then flood fill with paper 6
Add this drop shadow
Vertical 5
Horizontal 3
Opacity 100
Blur 7
Color black
Merge 8&9 negative
image it then add a gradient glow of your choice I picked one from the kit/tube
since they are both blues
I added the same drop
shadow as above; I normally use just 1 drop shadow easier that way for me…
Take one of the
tube’s paste it behind the merged layer and crop just her face off, do this how
ever you feel most confident in just getting the same face in both, mirror one
so the kind of look inside to the tag…
Click on Raster 2
Border c/p mirror
re-size by 55% pull to the far right hand edge of the square, add the drop
shadow from above…
Raster 1 c/p bling 2
re-size by 55% pull to cover the circle add a sharpen more to the element…
Click on raster
6(small circles) open Frame8 c/p re-size by 45% pull so it covers the top, one
then copy the re-sized version paste it on the same layer over the bottom one…
Click on raster 5 c/p
flower 1 mirror re-size by 50% pull to the middle of the small circles…
Leaf 4 c/p re-size by
65%, then add a sharpen more pull to the
left hand edge of your tag…
Go to the top layer
open 2 c/p re-size by 35% pull to the bottom edge of left circle…
Gem c/p re-size by
20% pull to the middle of the bow, then add a sharpen more to it...
Books c/p re-size by
40% mirror then pull to the lower right hand edge of your tag…
Birdcage c/p re-size
by 35% pull to make it sit on top of books…
Bird2 c/p re-size by
15% make sure to add a sharpen more to element, and then pull it to make it sit
in the middle of the cage…
Books 2 c/p re-size
by 25% pull to the front of books…
Bottle2 c/p re-size
by 30% pull to the left hand edge of books…
Flower2 c/p rotate
45° to the right re-size by 30% then pull
it to the left hand edge of bottle2…
Light2 c/p re-size by
30% pull to stand on top of the books by the bird cage…
Flower 6 c/p mirror
re-size by 35% pull to the far edge of your tag, the cat will cover up the
stems of this bundle…
Cat c/p mirror
re-size by 40% pull to the left hand edge of the rose…
Take the tube you
used for the face, or a different one that can sit down, and paste it pull to
the left hand edge of the cat, and re-size it by 35% …
I am taking a brush
and adding a sparkle layer over the tube, and a few other places, you can use
any sort of “sparkle” type brush…
Click on the very
bottom layer of your tag, open cloud and paste to the top of tag, and again on
the bottom of your tag, we are not going to use anything else for the background
of the tag…
Go to the upper top
most layer of your tag, make a new raster layer so you can add your credit’s
and give the kit maker her credit since she does require it…
Thank you for reading
my tutorial
©LadyDragus
~September 2015
Tag for Millie for the wicked Temp

Sep 4, 2015


Black Sails Bundle Pack

Clusters included in the bundle

Paper packs included in the bundle


And word art also included in the bundle.. This is a huge mega, kit package

Kandii Popz sells at a few stores
You can find them all on her blog
I made up 3 small set's of snags



Tags for kit maker


Nov 16, 2014
Oh how sweet it can be
In CandyLand Fairy


I am showing of a really sweet kit
Called Candyland Fairy
Done by Pink Paradox Productions
She sells at her own store'
Here is a preview of the kit

The show off tags are above
And I made up a Freebie Time Line banner
that says Candyland on it
** Do Not alter this in any way**
There is no avatar with this..
But I had to make a banner too

Subscribe to:
Posts
(Atom)
Kit Match For


Stores I Sell At


Blog Trains for HODG






Forums


Blogs I follow