My Blinkies :)



Creative Fabrica
Creative Teams








Artists and Store I like
















I got to play with a kit by
Stormlight Designs
Called Mother of Ravens


here Mother Of Ravens SLD

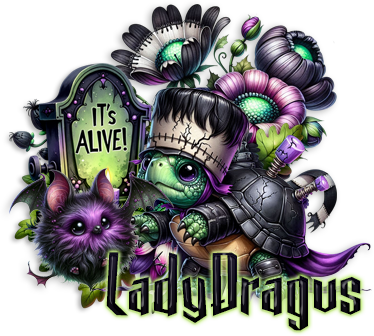
Nocturna

This tutorial is written in Corel 2023, but any version should work, this is written in hopes you have working knowledge of Paint Shop Pro or other graphics program… this is written by me, never meant to copy or look like your work…
I am working with a PTU kit
By Irish Princess Designs
Called Nocturna

You can find all of her stores
Here Irish Princess Designs Blog
I am using the PTU artwork
Of Trinita
Called Dark Queen

You can find her
I am using a mask by Rene`
AORK-mask17
Open a 750x750
Frame 5 c/p size this down by 55%
202 c/p mirror size this down by 35% pull to the upper left top of your frame
188 c/p mirror size this down by 35% pull to the upper right of your frame
54 c/p mirror size this down by 30% pull to the middle of the frame(tube will cover up the branch)
Take the full size version (with horns and wings) paste as a new layer, then size this down by 35% pull to the bottom middle of your frame
192 c/p size this down by 40% pull to the bottom of your tube
28 c/p size this down by 25% pull to the left edge of the tag
85 c/p size this down by 17% pull to sit in front of the well
167 c/p size this down by 20% pull to sit under the racoon
13 c/p size this down by 20% pull to sit on right side of the mushrooms
205 c/p size this down by 16% pull to sit on left side of the mushrooms
139 c/p size this down by 11% pull to sit in front of the mushroom
99 c/p size this down by 13% pull to sit on right side of the cat
119 c/p size this down by 11% pull to sit in between candles and bottle
32 c/p mirror size this down by 11% pull to sit on left side of the candles
197 c/p size this down by 11% pull to sit on right of the peacock
Click on the bottom layer of your tag
Open paper 24 size this down to fit your canvas 750x750 paste as a new layer, then apply the mask from above.
Merge this into one layer,
Click on top most layer of your tag add a new raster layer for your copyrights for tube and credit to the kit maker, add a saying to the tag and you’re done…
Thank you for reading my tutorial
©LadyDragus~2025


Goddess of Crows


This tutorial is written in Corel 2023, but any version should work, this is written in hopes you have working knowledge of Paint Shop Pro or other graphics program… this is written by me, never meant to copy or look like your work…
I am using a PTU kit
By Wicked Princess Scraps
Called Goddess of Crows

You can find the kit
I am also using the matching tube
By Trinita
Called Lady Crow

Here Lady Crow
This is a time line banner tutorial
820x360 for the banner 300x300 for the avatar
we will also work on the avie as we go
Flood fill both tags with paper 11
Banner-
60 c/p size this down by 50% pull to the upper right top of the banner
87 c/p size this down by 50% pull to the far left edge of the banner
25 c/p size this down by 38% pull to sit in front of the black rocks on left edge of your banner
9 c/p size this down by 50% leave in the middle of the banner
164 c/p pull behind the bridge size it down by 65% pull so it looks like it goes under the bridge
51 c/p size this down by 48% pull to stand on the left edge of the bridge, where the smaller part is still on the left top of the banner
Take the full sized version of the tube w/ two crows on her hands size her down by 14% pull to the middle of the bridge
49 c/p size this down by 50% pull to the right edge of the banner
46 c/p size this down by 19% pull to sit on right edge of the bridge by the castle
62 c/p size this down by 19% pull to sit on right edge of tree
69 c/p size this down by 19% pull to stand on the right side of the tubes dress
61 c/p size this down by 19% pull so it is between the crows on the rock and the staff
57 c/p size this down by 11% pull to sit in top branch of the trees
63 c/p size this down by 21% pull to sit on the left side of the tree
99 c/p size this down by 11% pull to sit on left edge of the tube
58 c/p size this down by 12% pull to sit on left edge of the melting egg
162 c/p mirror size this down by 12% pull to sit on left edge of the kitten
54 c/p size this down by 12% pull to sit on the rose’s on left edge of your banner
Avatar
Take the bridge and paste as a new layer, 3
then take the sized down version of the tube
The melting egg paste as a new layer on the right side of the tube
Add a new layer for the copyright and credit to kit maker, add your saying to this avtar and the banner and you’re done…
Thank you for reading my tutorial
©LadyDragus~2024
Tags for kit maker


Pics For Design

Kit Match For


Stores I Sell At


Blog Trains for HODG






Forums

Blogs I follow