Search This Blog
Labels CT Teams
- IPD-CT (410)
- PTUClusterFrames (240)
- RebeccaSinz-CT (162)
- Crystal-CT (127)
- Honored Scraps-CT (83)
- WickedPrincessKit (49)
- HappyPumkinCT (47)
- YudesKreationz (28)
- DeniseCArt-CT (24)
- YKS-CT (22)
- Hania'sDesign (19)
- O'Srap Blog Train (18)
- Scrap Dimensions (16)
- Honored Scraps (15)
- Moonshine Dezinez (15)
- HappyPumpkin (13)
- Passion4Scraps (9)
- Chrisje's-CT (8)
- MélinouCT (6)
- Scraps Dimensions (4)
- YK-CT (2)
Oct 11, 2016
Tuesday, October 11, 2016 | Edit Post
Fall Colors
This tutorial is
written in Corel X5, but any version should work. Its’ written in hopes you
have a working knowledge of Paint Shop Pro, or other graphic program…
This is not meant to
look like your work…
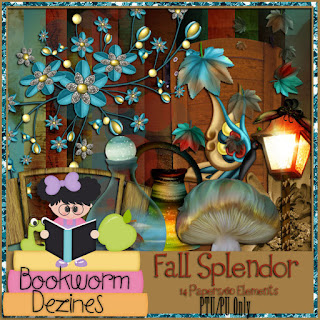
I am using a PTU kit
By
Bookworm Dezines
Called
Fall Splendor
You can find her kits
Here Smiley Creations
I am using a PTU tube
By Di_Halim
This tube can be
bought
At Pics For Design
Here Pics For Design
Font used Monotype
Corsiva
I am using a FTU template by
Becky P (now Simple
Expressions)
Here BP_Temp49
Using Canvas Size up
it to 725x725
Shift +D close the original
template
Delete the white
background in raster 1
Shape 3 flood fill
with paper13
Shape 2 flood fill
with paper 1
Shape 1 flood fill
with paper 6
Frame 1,2,3 fill ,
flood fill with paper 8 on all 3 of them
Frame trim 1,2 &3
add a noise of 100% with Gaussian, monochrome checked
Then add a blue color
to the noise on all 3 of the trims…
Frame 1, 2, &3
flood fill with paper5
Add this drop shadow
Vertical
Horizontal 3
Opacity 50
Blur 5
Color black
Take your tube paste
it over the frame fills and crop off where just her head is showing, you do
this however your comfy with.. Each does it differently
Click on the top most
layer
28 c/p re-size down
by 25% pull to the top left corner of your top frame…
26 c/p re-size by 25%
pull to the lower left hand edge of frame…
Click on frame 3
grommet,
36 c/p re-size by 40%
pull to the middle of the gromet in the top frame…
14 c/p re-size by 60%
pull to fit between grapes…
54 c/p rotate 20° to
the left re-size by 40% pull to cover the bottom edge of lamp…
13 c/p re-size by 35%
pull to the bottom edge of flowers…
9 c/p re-size by 25%
pull to the bottom edge mushroom…
8 c/p re-size by 20%
pull to the middle of yellow flower…
Go back to top most
raster layer…
2 c/p mirror re-size
by 25% pull to the lower right hand of tag…
21 c/p rotate 20° to
the right re-size by 25% pull to the top of lamp post..
Make a new raster
layer to add your copyright and credit for kit maker, and what ever saying you
wish to have..
©LadyDragus~2016

Subscribe to:
Post Comments
(Atom)
Labels
- RachelDesignsMask (212)
- Elegancefly (77)
- CDO-Tube (75)
- MillieMask (65)
- Alex Prihodko (58)
- FTU Kit (55)
- NocturnTube (55)
- Exclusive PFD (51)
- BlogTrain (43)
- Alehandra Vanhek (42)
- Help4Casper (42)
- VivMask (35)
- Free wallpaper (33)
- MillieTemp (33)
- JoseCanoTube (32)
- HODG-Store (30)
- HODGLD (30)
- AORK-Mask (28)
- DAH-Tube (28)
- ArthurCrowe (24)
- Carita Creationz-CT (22)
- CU/PU (20)
- SimoneMask (20)
- FreeBanner (19)
- O'Srap Blog Train (18)
- CILM-Tube (16)
- AnnaLiwanag (15)
- RachelDesigns (15)
- DragonflyMask (14)
- KarmaMask (14)
- HalloweenSnags (12)
- HorsePlayTemp (12)
- LadyMishkatube (12)
- AlecRud (11)
- CU/AI (10)
- BarbaraJensen (9)
- BeckyP-Temp (9)
- Goldwasser (9)
- Passion4Scraps (9)
- Eennizzietube (8)
- P4SBlog (8)
- EscapeR-blog (7)
- FTU FTU-CU (7)
- BCA-Awarness (6)
- MartinAble (6)
- NocturneTube (6)
- Anna Marine (5)
- Atarikatube (5)
- Blog Train (5)
- FoxFoggyDog (5)
- AbbeyDawn (4)
- FidorovaMaria (4)
- Fiodorova_Maria (4)
- JuliaFoxtube (4)
- Laguna (4)
- MagDreamblog (4)
- ArtofFreyatube (3)
- CarolinaSeabra (3)
- Doodlebydesign (3)
- SyllyTemp (3)
- AndyCooper (2)
- BrutalDesigns Temp (2)
- HODGPTU CU Tube (2)
- HorsePlayMask (2)
- MarusovA (2)
- MelissazMask (2)
- MizTeequeTemp (2)
- Amberly Berendson (1)
- AtillaTube (1)
- BreastCancer (1)
- BrutaDesignsMask (1)
- CU/PU-PGD (1)
- DannyLee (1)
- FourmStyletut (1)
- JosephineSha (1)
- Lin Temp (1)
- MarusovA ART (1)
- Michel Calandra (1)


.gif)


0 comments:
Post a Comment
Thank you for reading my tutorials and snagging my snags. I design under House of Dragus Graphics by LadyDragus