My Blinkies :)


Creative Fabrica

Creative Teams


Artists and Store I like


Jun 29, 2015
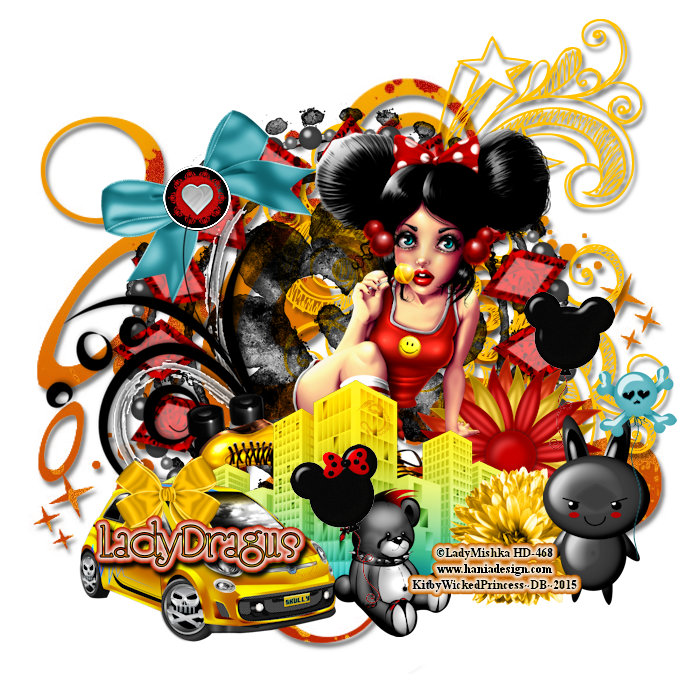
I Dream of being a
Roller Girl.
This tutorial is
written in Corel X5, but any version should work. It’s also written in hopes
you have a working knowledge of Paint Shop Pro, or other graphics program…
This is written out
of my own mind and thought’s never meant to look like others.
(My style of tutorial
is never written the same is not all tags are the same, and not all have the
same thought process, it could take me 1 hour to write one, but sometimes it
can take me 3, so they vary all the time.. I’m sorry but I hardly ever make two
tags alike , maybe from the same kit, but never alike…)
I am using a PTU kit
By
Wicked Princess
Scraps
She sells in a few
stores
You can find them all
on her blog
This kit was made to
match a tube by
Lady Mishka titled
Roller Girl
Roller Girl
You can now get some
of her tubes
**I got this when this tube when this tube was at
Hanias’ Design
**I got this when this tube when this tube was at
Hanias’ Design
Or at this store
Here
At Scarps and Co...
Open a 700x700 size
tag, you can re-size this layer if you wish
You will need MuRa’s
Filer Meister Copies for this next step in the tag
Open Gem re-size it
by 15% and use this setting in the plug-in

Add this drop shadow
Vertical 5
Horizontal 3
Opacity 50
Blur 5
Color Black
Frame 4 c/p pull
behind gems, re-size by 80%
Doodle 3 c/p pull
behind the frames make it be in the middle of the frames…
Bow 4 c/p re-size by
65% pull to the upper left hand edge of gem frame…
Button c/p re-size by
15% pull to the middle of the bow, add a sharpen more to the element, and then
merge down onto the bow…
Swirl 2 c/p rotate
45° to the left re-size by 65% add a sharpen more pull to the far left hand
edge of your tag…
Flower 2 c/p re-size
by 45% pull to the far right hand edge of your tag…
Balloon 2 c/p re-size
by 35% pull to the right hand edge of flower…
Cityscape c/p re-size
by 60% pull to the bottom of the frame…
Take your tube paste
it behind the cityscape mirror re-size by 75% pull to the right hand edge of
the tag, clean off the part of her shoe’s that are showing…
Go back to the top of
your tag open car re-size by 40% pull to the left hand edge of cityscape….
Flower 9 c/p mirror
re-size by 35% pull to right hand edge of the cityscape…
Bunny c/p re-size by
30% pull to the right hand edge of flower…
Balloon4 c/p re-size
by 35% pull to the right hand side of bunny so it looks like he is holding on
to the balloon…
Bow 1 c/p re-size by
25% pull to the top of the car…
Bear c/p re-size by
25% pull to the right hand edge of the car…
Balloon 3 c/p re-size
by 35% pull to the left side of the bear so it look likes the bear is holding
it…
Go to the bottom
layer paste Doodle 2 add the drop shadow from above and pull up to the top
right hand edge of the tag…
On the very bottom
layer I flood filled it with paper9 and used a odd shaped mask by Rebel Dezings
she closed her site down so I am not sure if they are all up on the Zone Groups
or not..
Tag's for kit maker

And one for our CT manger
Kate


Subscribe to:
Post Comments
(Atom)
Kit Match For


Stores I Sell At


Forums

Blogs I follow

.gif)


Blog Trains for HODG


0 comments:
Post a Comment
Thank you for reading my tutorials and snagging my snags. I design under House of Dragus Graphics by LadyDragus